

I’ve been playing with this technique off and on for a year or so now and really enjoy it! It’s great for quick quilt tops AND for kids just getting started:
Today I’m going to show you how to use fusible interfacing to piece precuts quickly & get perfect points while you’re at it! I’ve got a written tutorial AND a video tutorial for you, so whatever your learning style, you’re covered!
Have you ever struggled with matching points in your quilting? Today I’m excited to share one of my favorite techniques for achieving perfect points every single time – the grid method using fusible interfacing!
This technique is perfect for quilters of all levels, but especially helpful if you struggle with precision piecing or want to speed up your quilt assembly. Let me walk you through this game-changing method!
What You’ll Need
- 1″ gridded fusible interfacing (I highly recommend the 1″ grid so it works with any size square)
- Fabric squares (I’m using pieces from my new Modern Vintage: Treasured collection)
- Iron
- Towel or protective ironing surface
- Sewing machine
- Seam ripper (trust me, you’ll actually want to use this!)
Video Tutorial
If you’re a video tutorial kinda quilter, check out the video below. For us blog-era learners, I’ve got the written tutorial (with pictures!) below for you, so just keep on scrolling!
Setting Up Your Space
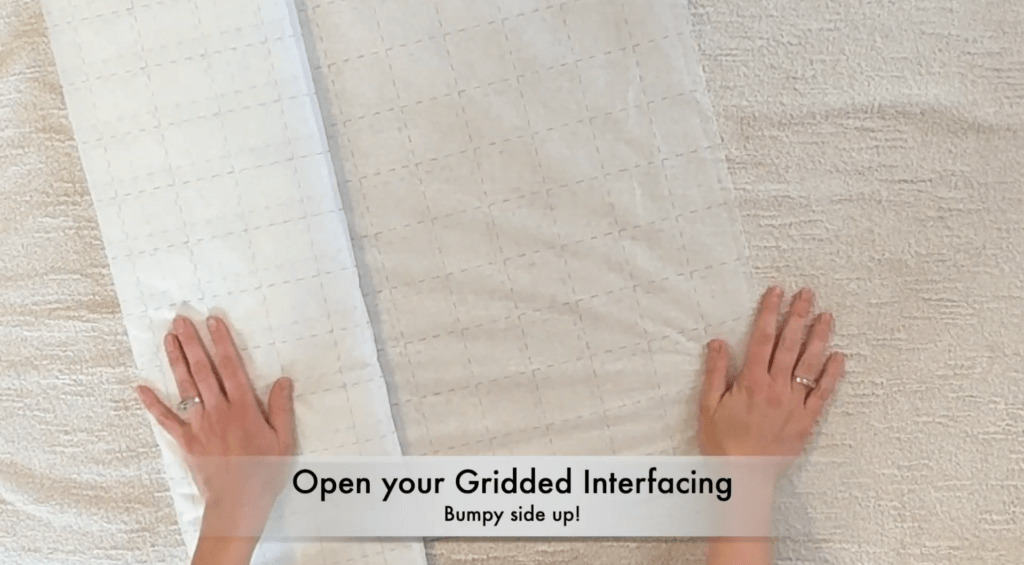
First things first, let’s create a safe ironing surface. I’m using a quilted piece of fabric with a towel on top to protect my work area. This gives me plenty of space to arrange my pieces and fuse them securely.
The Magic Grid Method
1. Cut and position your interfacing – Cut the interfacing to size leaving about 2″ extra interfacing on each side. Make sure the bumpy (adhesive) side is facing UP.
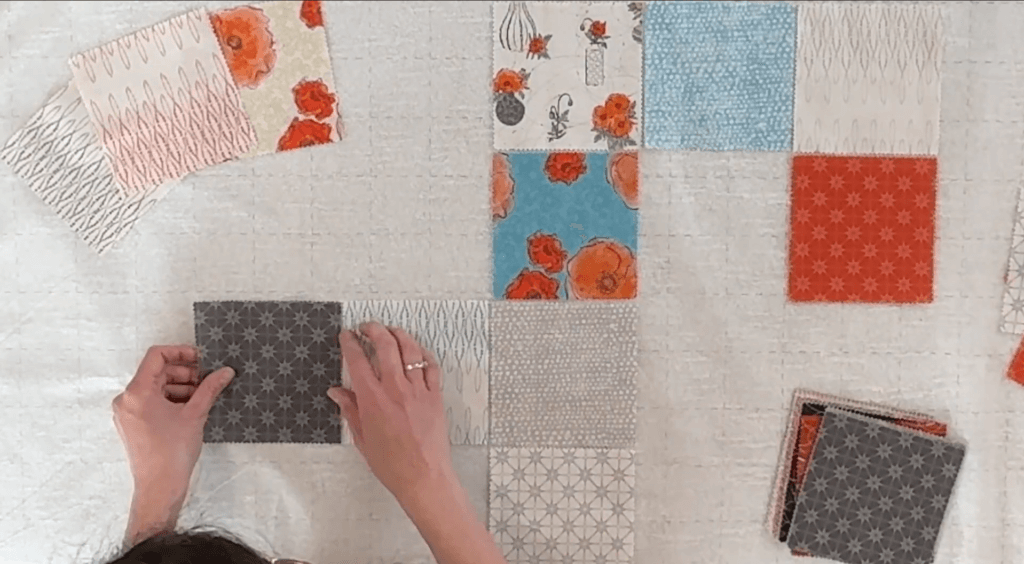
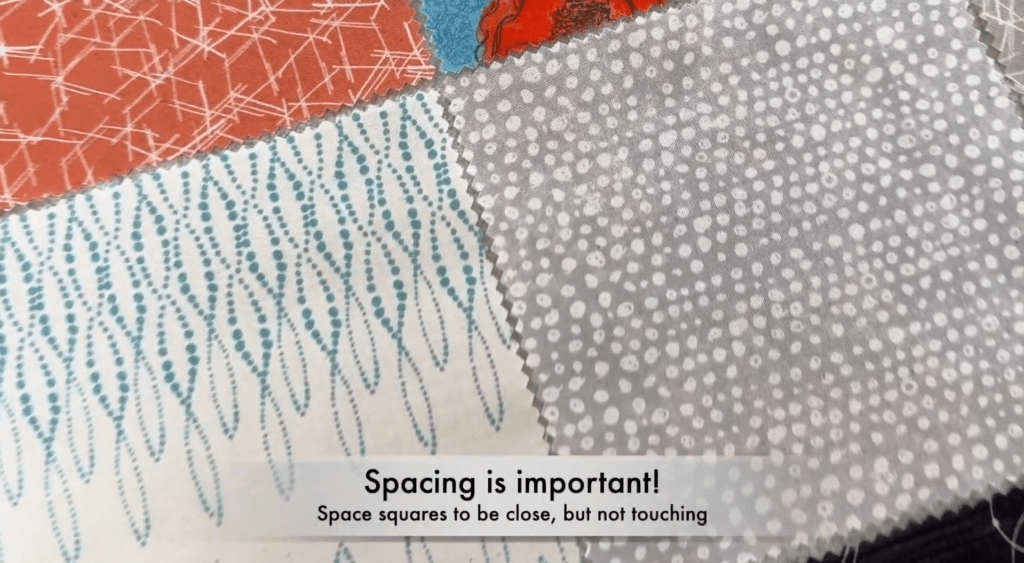
2. Arrange your fabric squares – Here’s the key: use the grid lines as your guide and leave about 1/8″ space between all your fabric pieces. Don’t let them touch! This little gap is crucial for when we fold and sew later.
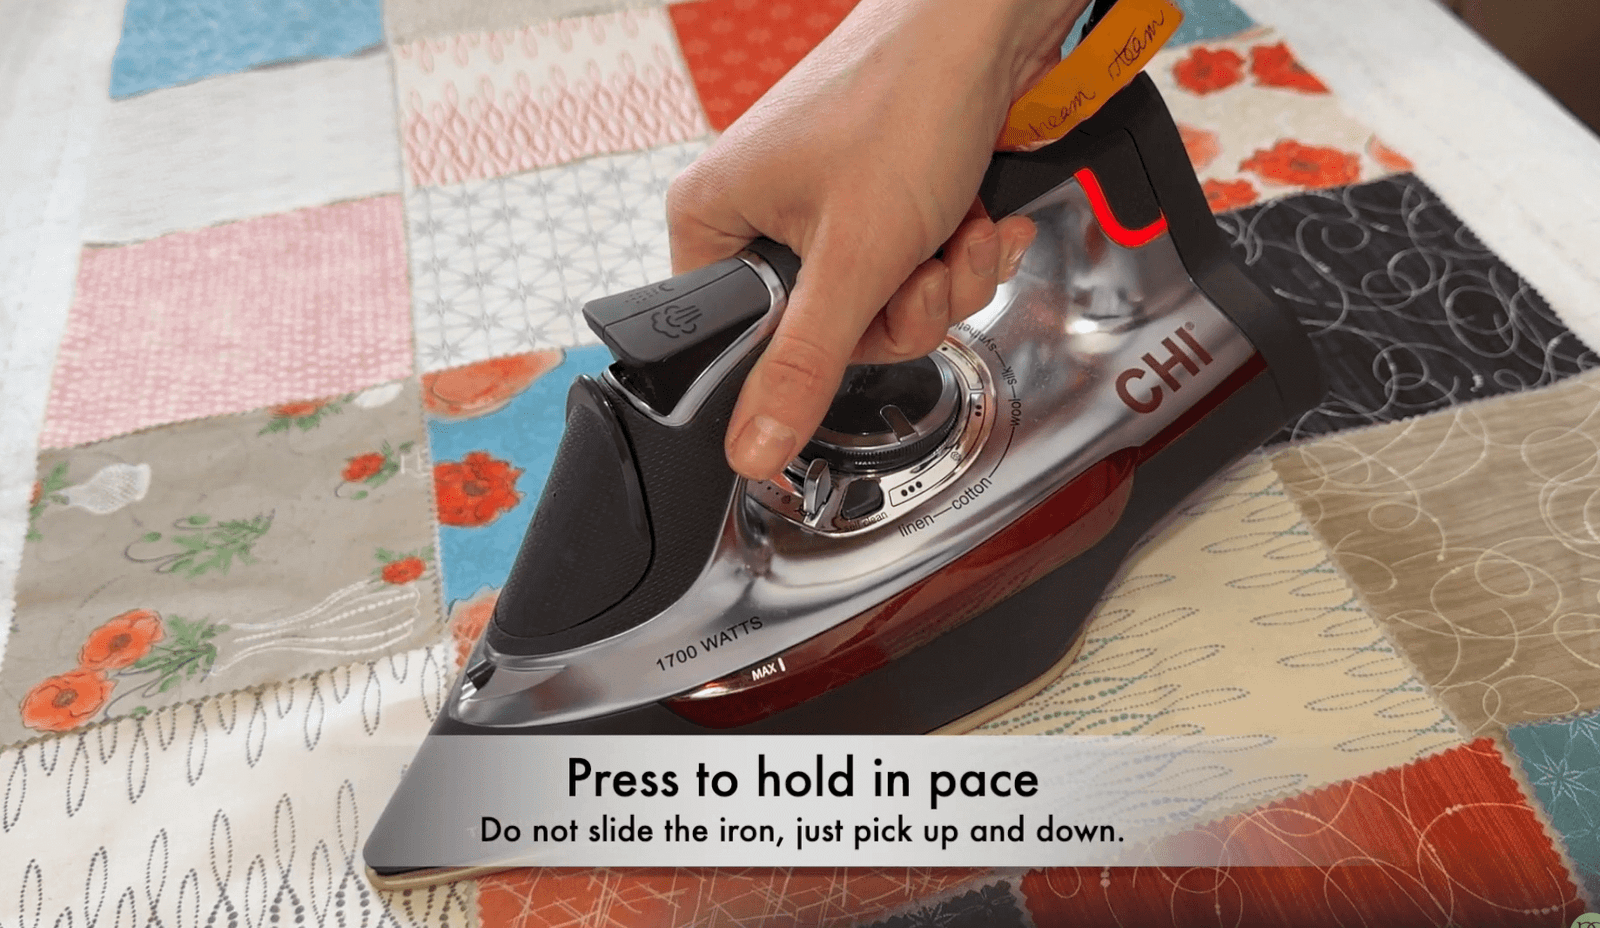
3. Press with your iron carefully to hold in place – Set your iron to the cotton setting and make sure the steam is off. Don’t slide your iron – you’ll shift those perfectly placed pieces! Instead, use a press-and-lift motion to tack everything down.
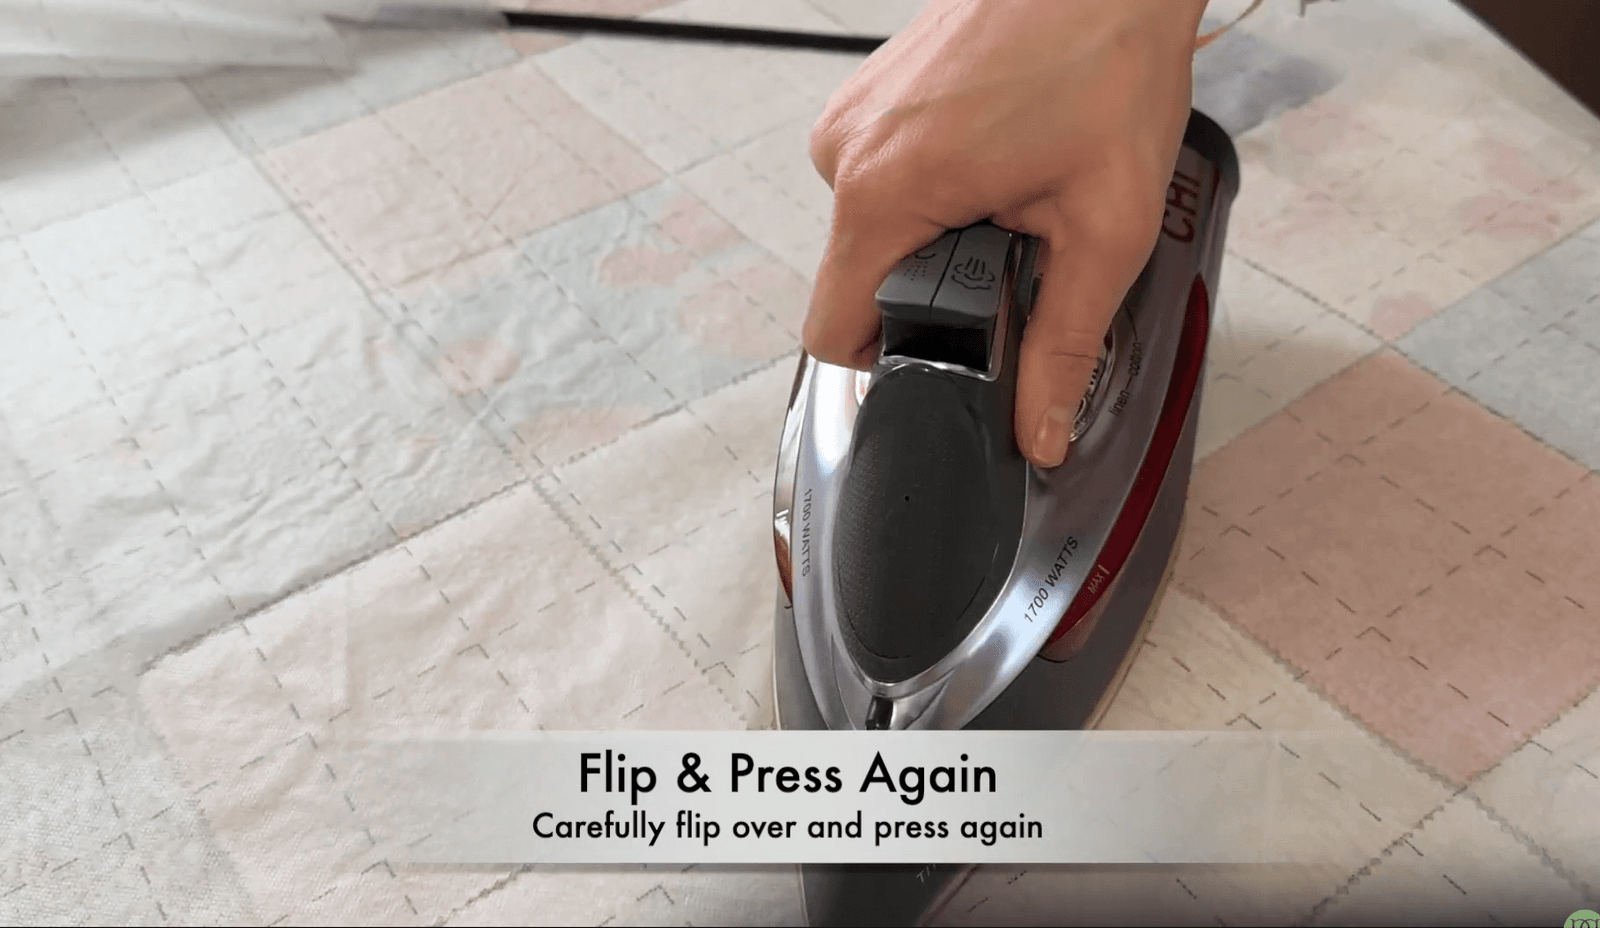
4. Secure with a pressing cloth – For a more thorough bond, place a pressing cloth (just another piece of fabric) over your arrangement and iron again on top of the fabric. This time it’s okay to slide your iron. Then flip the whole thing over and complete that press-and-lift motion again on the back. Now those squares aren’t going anywhere!

Creating Perfect Seams
Now comes the fun part!
1. Fold inwards along the grid lines – The interfacing should fold easily along the grid lines. I like to start with all the vertical seams.
2. Sew 1/4″ from the fold – Line everything up and stitch with a 1/4″ seam allowance all the way down.
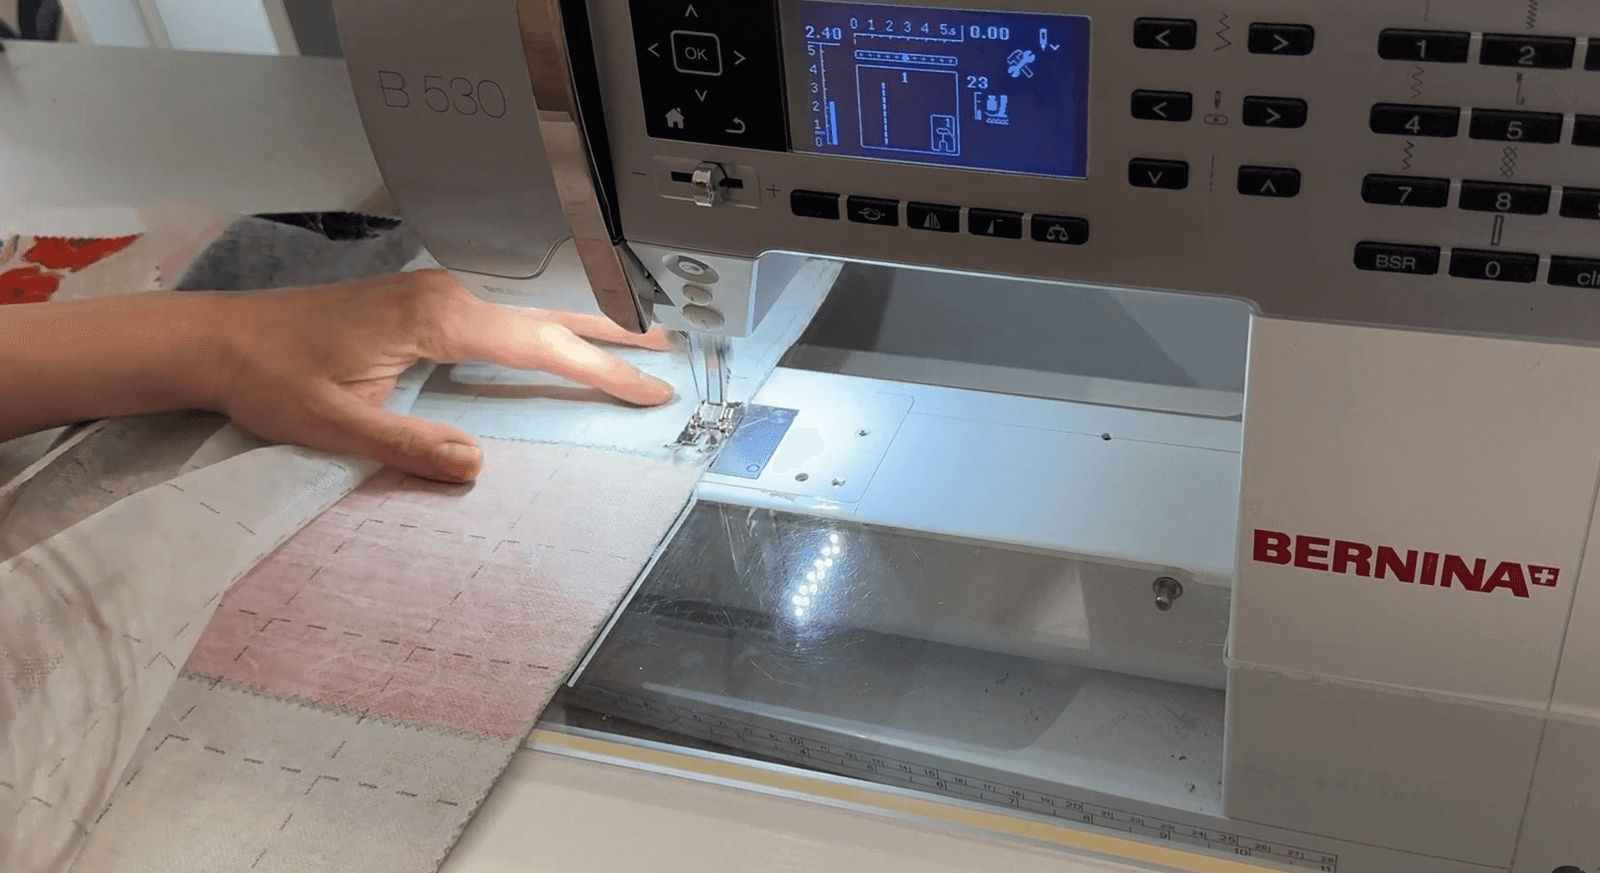
3. Repeat for all parallel seams – Work your way across the quilt top, folding and stitching each vertical seam parallel to the one you started with.
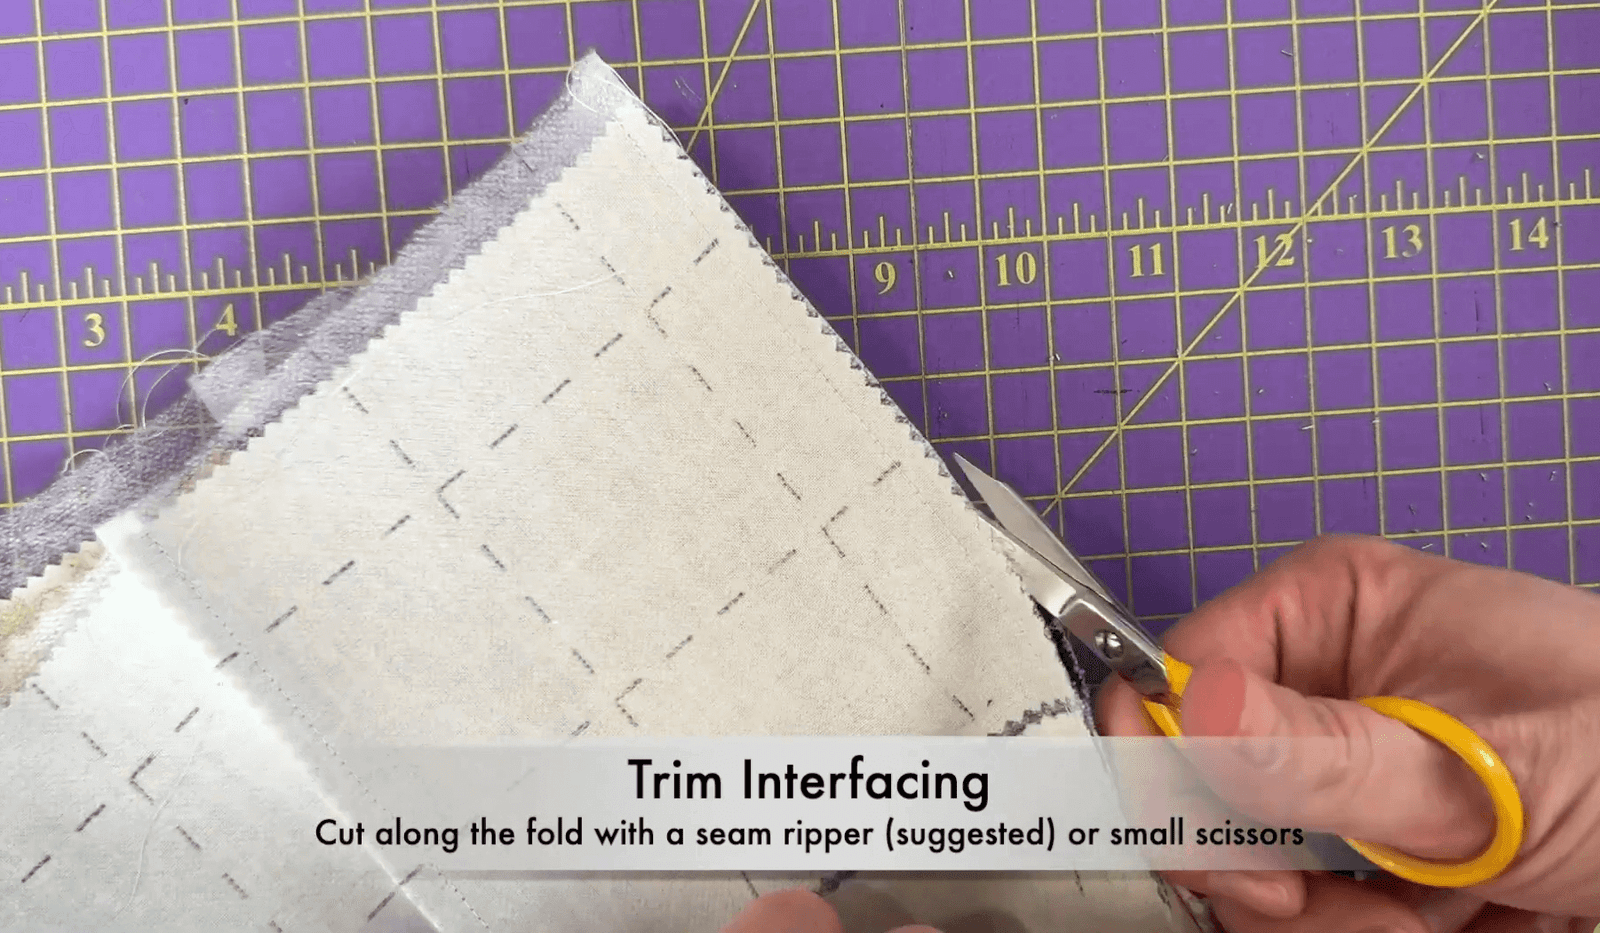
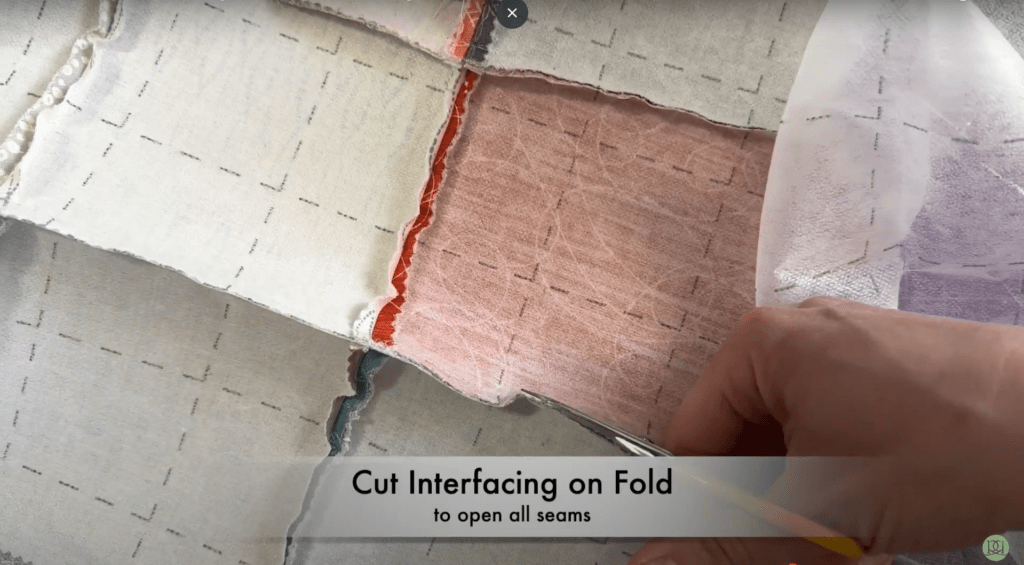
4. Open the seams – Using your seam ripper (seriously, don’t be like me trying to use scissors in the video!), cut along the interfacing folds to open up your work. The seam ripper will glide through like a champ!
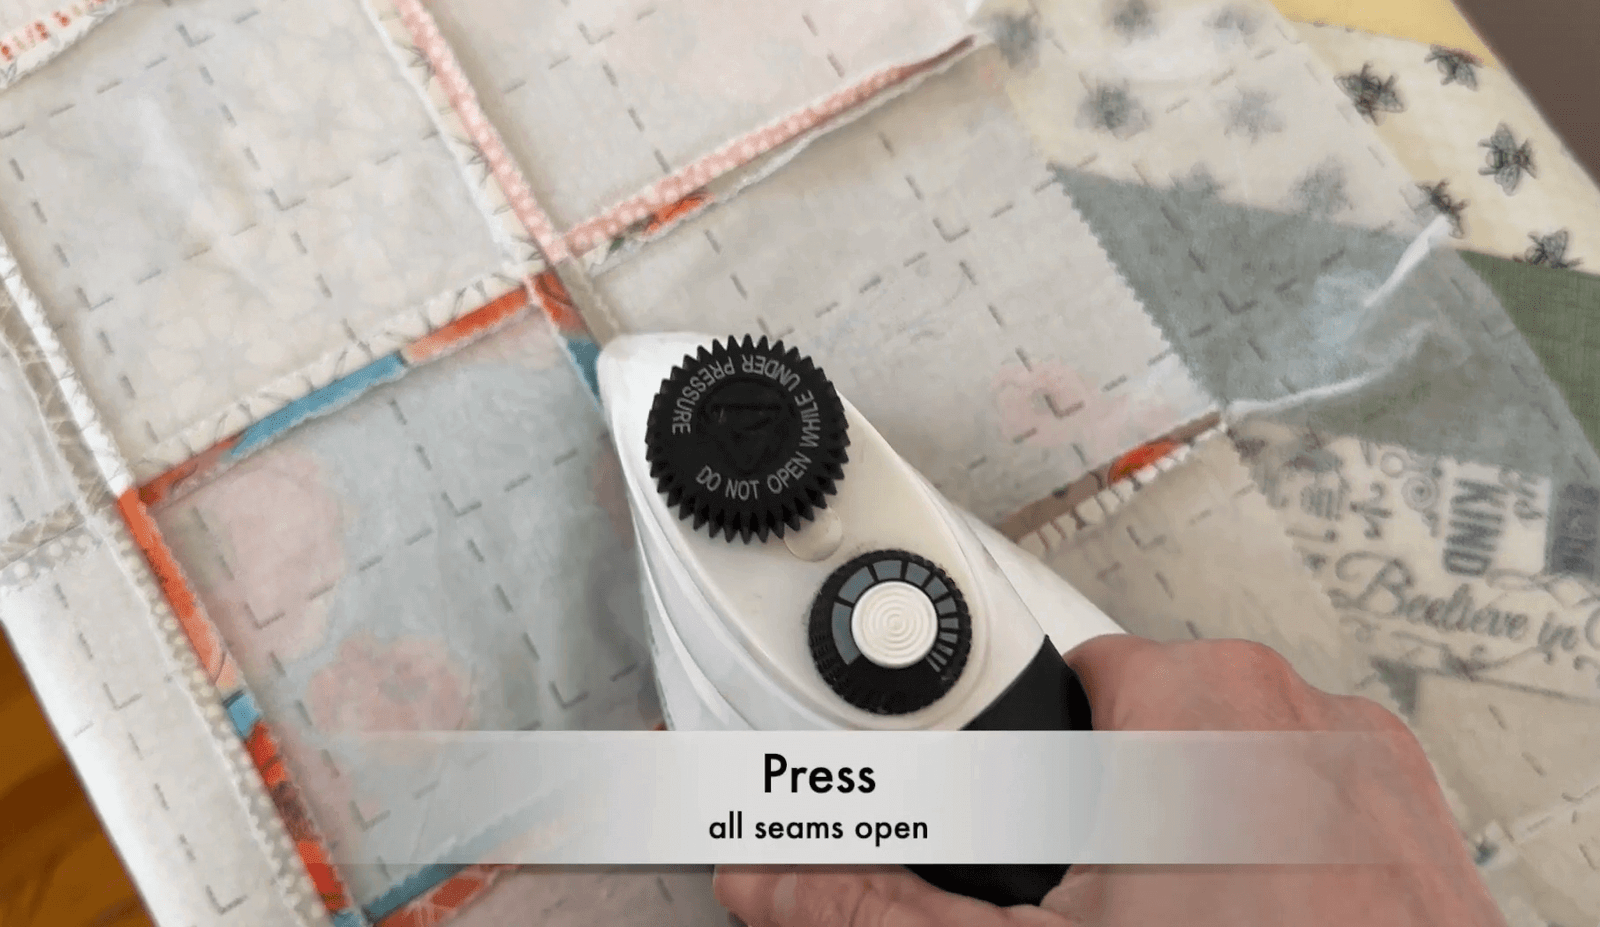
5. Press seams open – Once all seams are cut, use your iron to press the seams open.
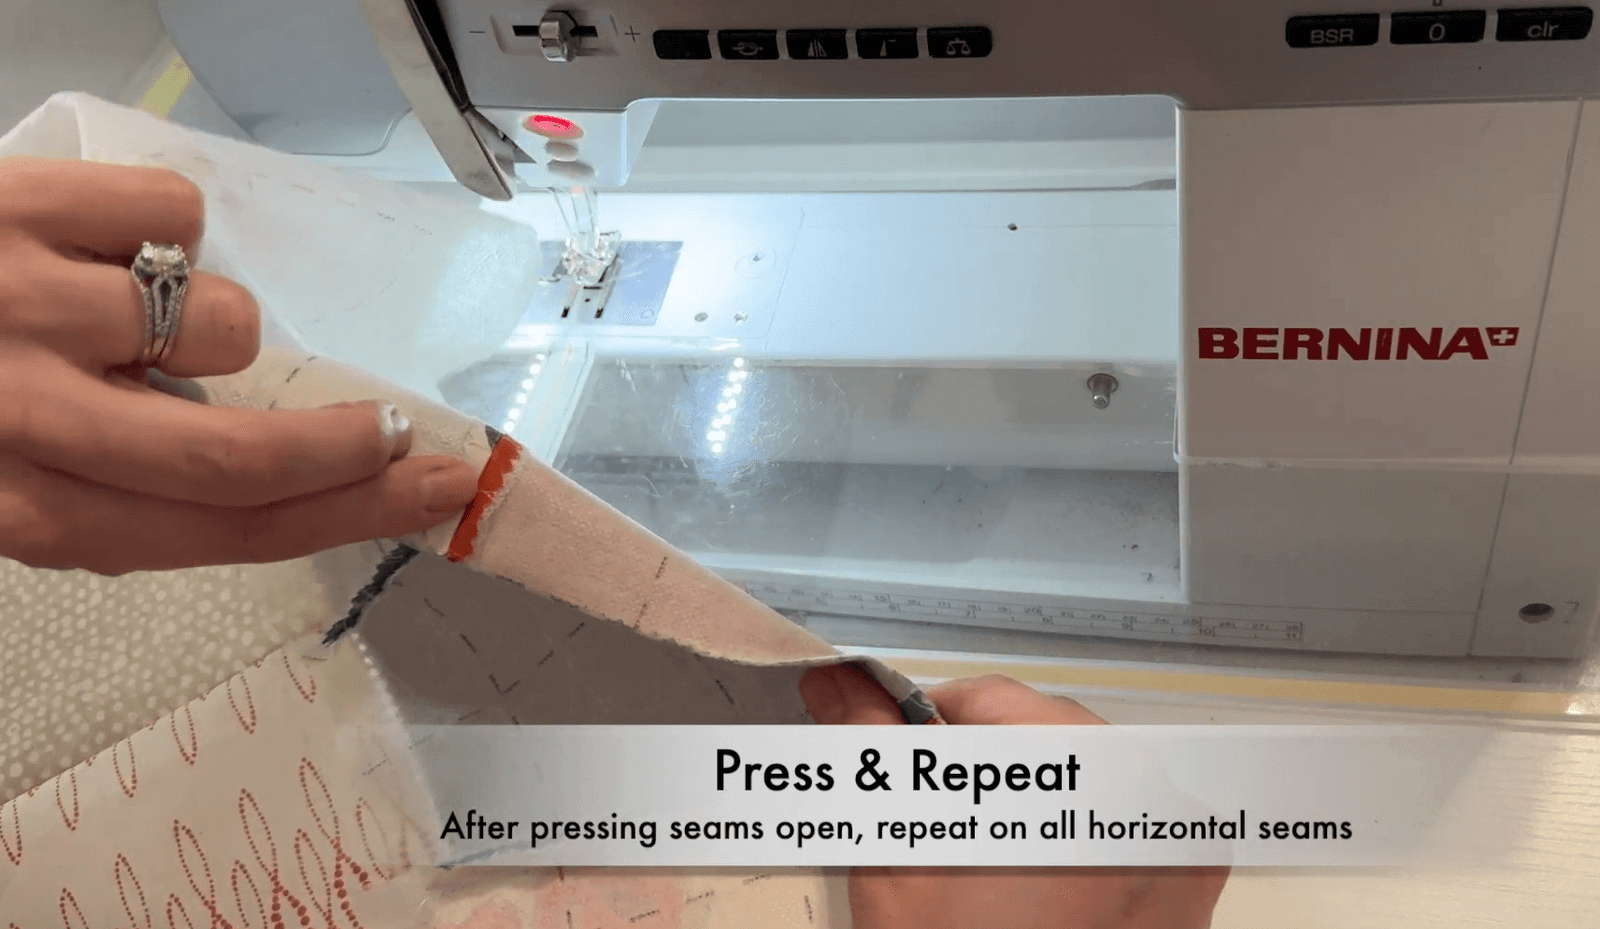
6. Repeat in the opposite direction – Now follow the same process, folding inward along the horizontal grid lines. Sew down each of the the folds parallel to each other with that 1/4″ seam allowance, cut the interfacing, and press down all the seams with your iron.

The Big Reveal!
After completing both directions, flip over your quilt top, press one more time with your iron to flatten everything out (we all know this is the best part!).
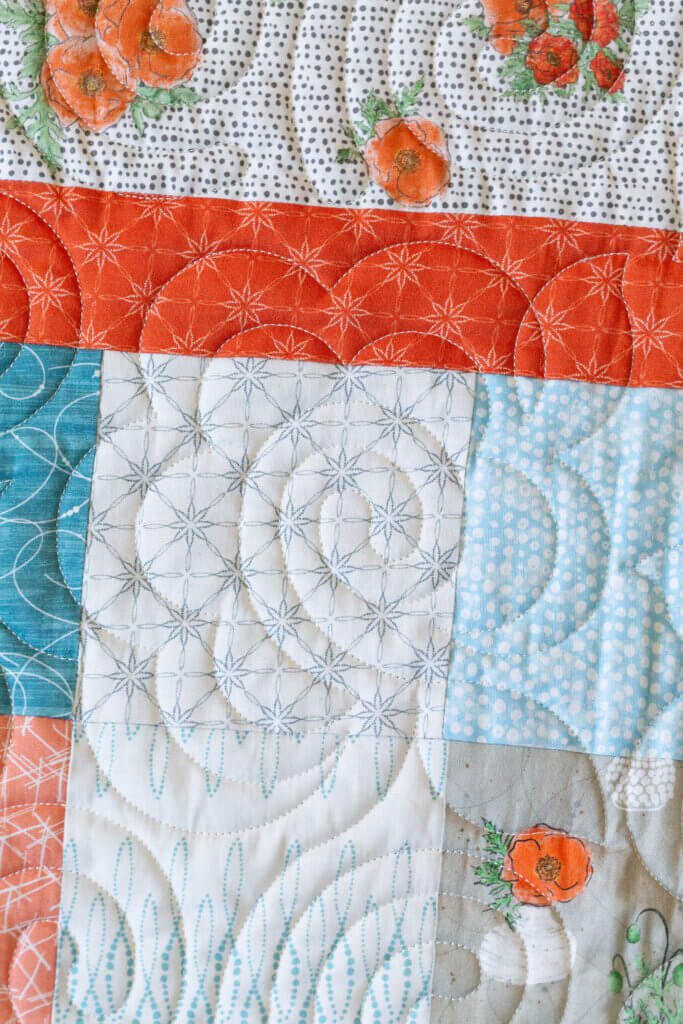
Now admire those PERFECT matching points! Honestly, it’s like magic every single time. No matter how many quilts I make using this method, I still get excited when I see those crisp, precise intersections.
A Little About My New Fabric Line
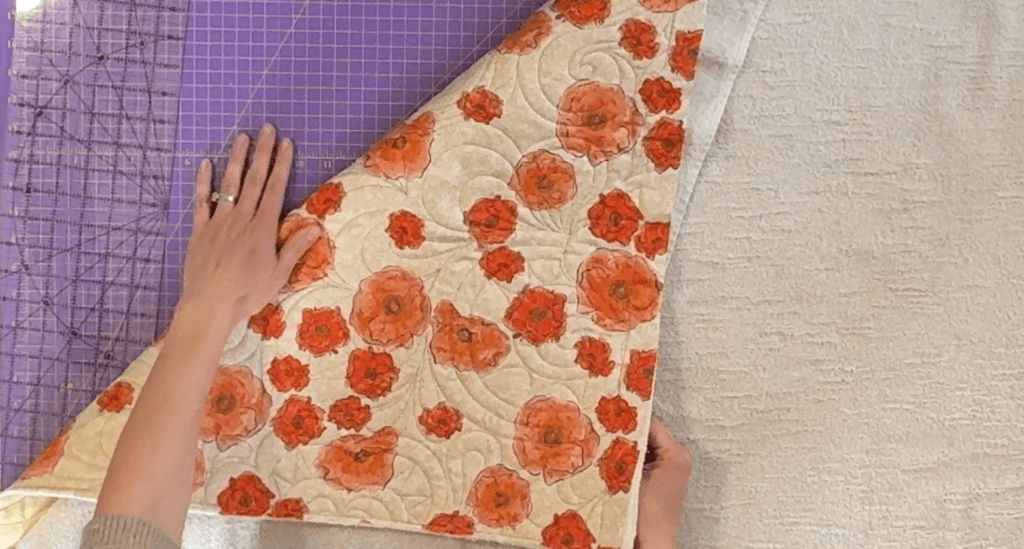
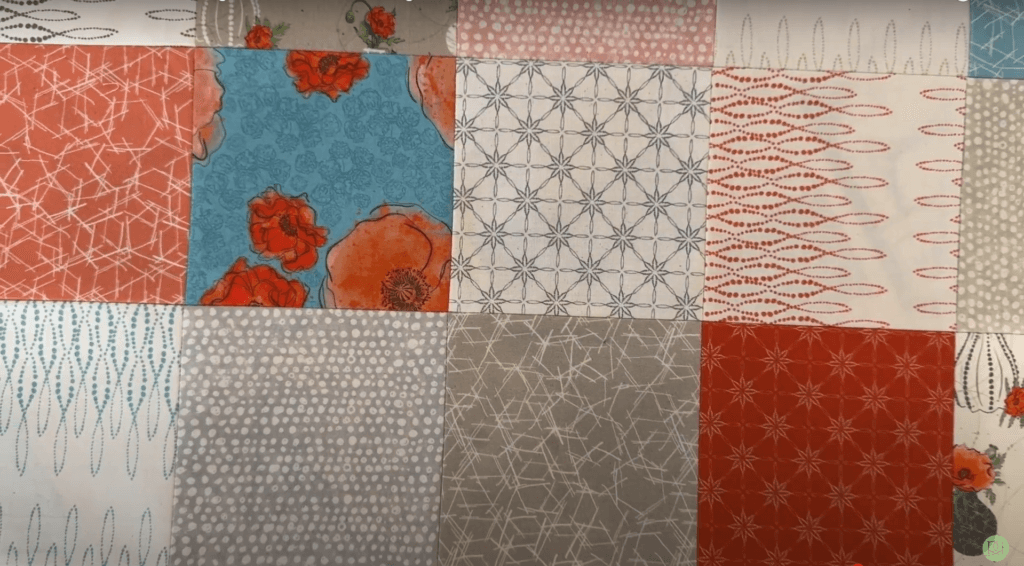
If you’re loving the fabrics I used in this tutorial, they’re from my new fabric line for Benartex called “Modern Vintage: Treasured” This beautiful line is printed on 100% unbleached cotton and is OEKO-TEX Standard 100 certified, creating an exceptionally soft quilting cotton. You can learn more about the line here!

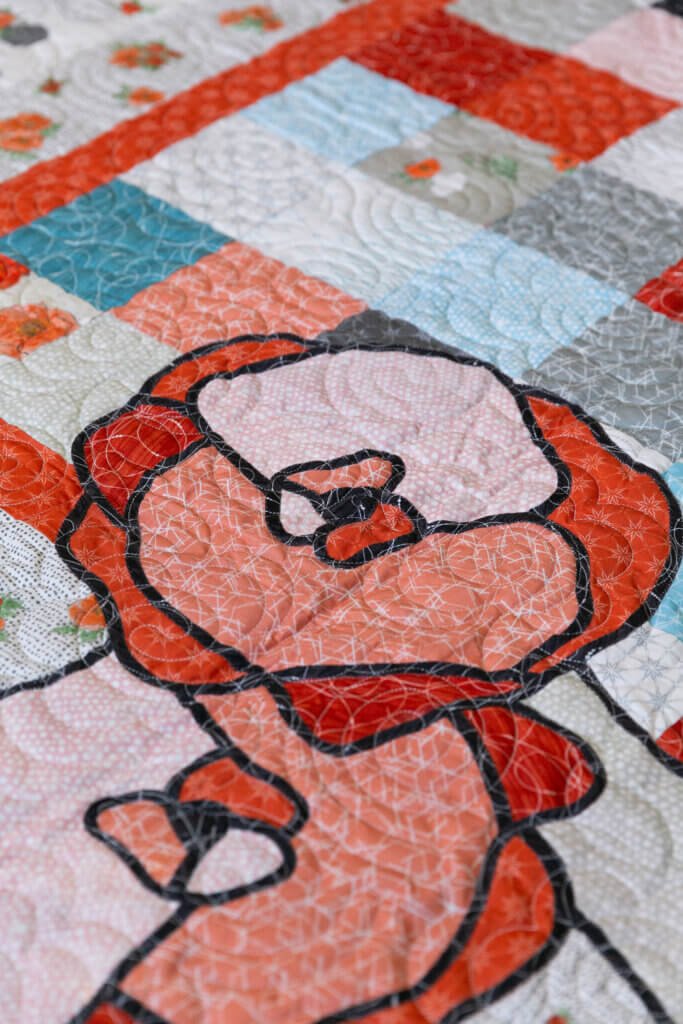
With colors like dusty blue, off-white, and terracotta, this collection brings warmth and vintage charm to any project. The fabrics you see in this tutorial are featured in my Poppy Patch quilt pattern, which combines this grid method with bias tape appliqué for an unforgettable design.


Ready to Try It?
This grid method is perfect for the center of the Poppy Patch quilt or any project where you want perfect points with minimal fuss. Have you tried the grid method before? I’d love to see your creations if you give it a go!
Recommended for this Blog Post
