When you’ve spent weeks (or months!) creating a beautiful quilt top, those borders really matter! Today I’m going to walk you through creating mitered borders – a technique that takes your quilt from homemade to professionally finished in just a few extra steps.
Mitered borders are especially perfect for striped fabrics or prints with directional patterns that you want to flow continuously around the corners. Trust me, once you try this technique, you’ll never want to go back to basic borders!
Why Mitered Corners?

Regular borders meet at a 90° angle at the corners, which means any stripes or patterns get abruptly chopped off. Mitered corners create that beautiful 45° angle where the patterns flow seamlessly around the corner – just like a picture frame!/
Video Tutorial
I know you love these videos, so I’ve got both a video tutorial and a written tutorial below that. Either way, enjoy!
Let’s Get Started!
Cutting Your Border Strips
The width of your border strips can be whatever you like, but length is crucial for mitered borders.
Pro Tip: For each border, add the width of your border strip TWICE to the length you’d normally cut. This gives you the extra fabric needed for those mitered corners.
For example, if your border is 4″ wide and your quilt side measures 60″, you’ll need a border strip that’s at least 60″ + 4″ + 4″ = 68″ long.
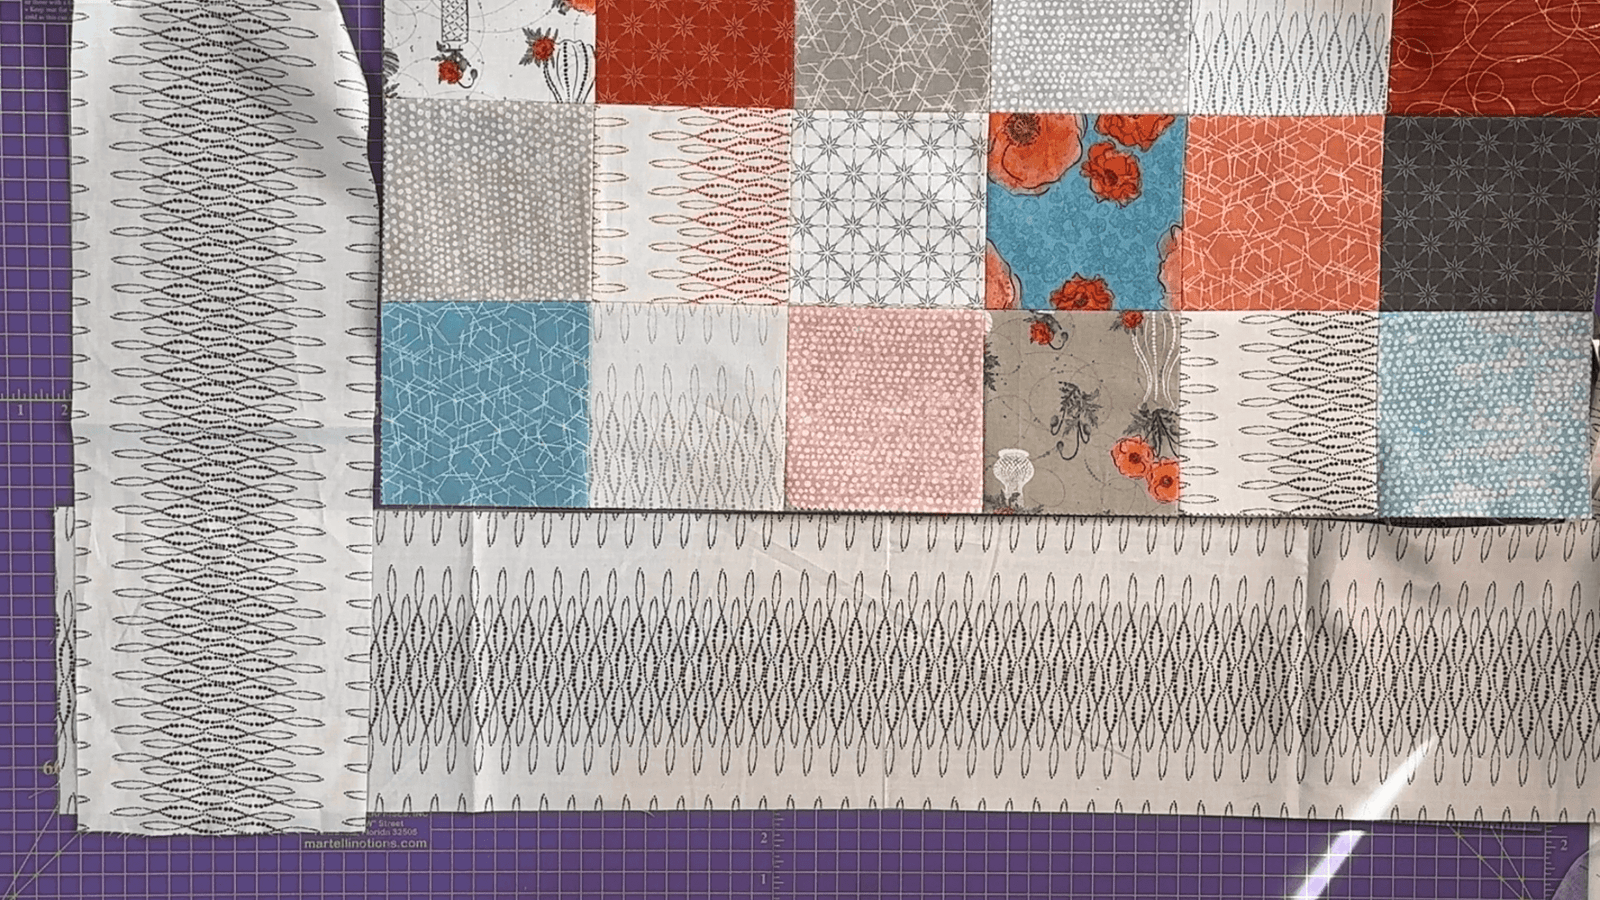
When laid out, your borders should overlap at the corners – this overlap is what creates our mitered corners!
Attaching Your Borders
- Lay your first border strip along one edge of your quilt, right sides together. Make sure that the border hangs over enough at each end.
- Important Step! Before sewing, take an erasable fabric marker and mark a line 1/4″ from each edge of your quilt top. This creates a visual reminder of the stopping point for your stitching.
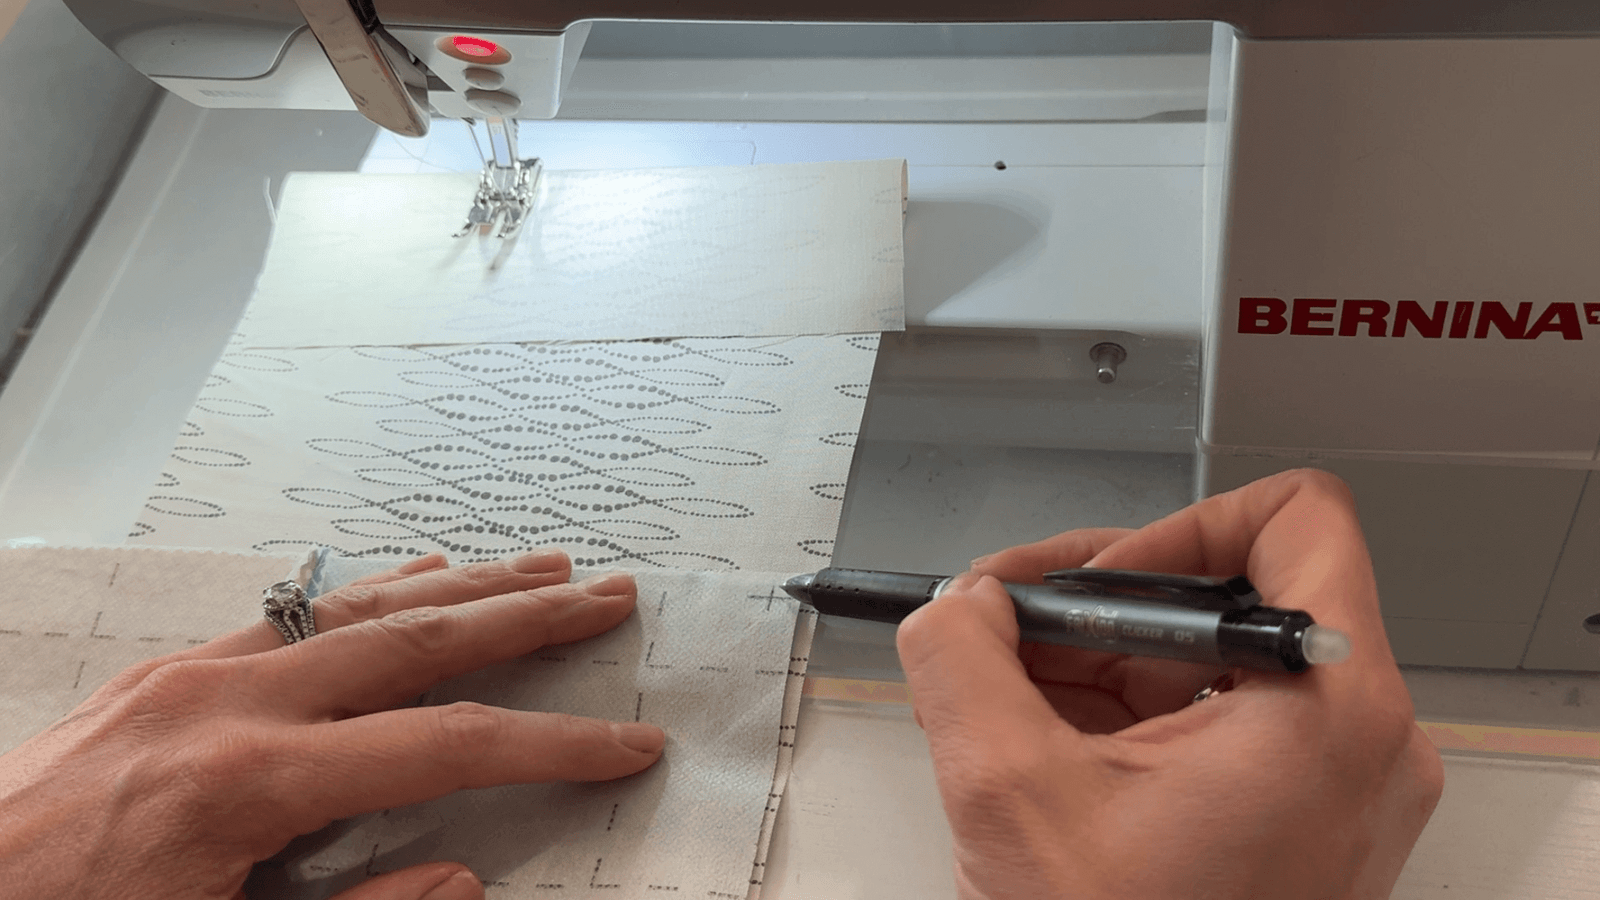
- Sew the border to the quilt, starting and stopping at the intersection of those marked lines. Remember to backstitch carefully at both ends, not going past the intersection.
- Repeat this process for your adjacent border, making sure to not catch the other border in your stitches.

Creating the Perfect Miter
This is where the magic happens!
- Lay your quilt on a flat surface – this needs to be big enough for your entire quilt to lie flat without any bunching.
- Fold your quilt on a 45° angle across the corner where your borders overlap. The quilt center will fold diagonally, and the borders should lie perfectly on top of each other.
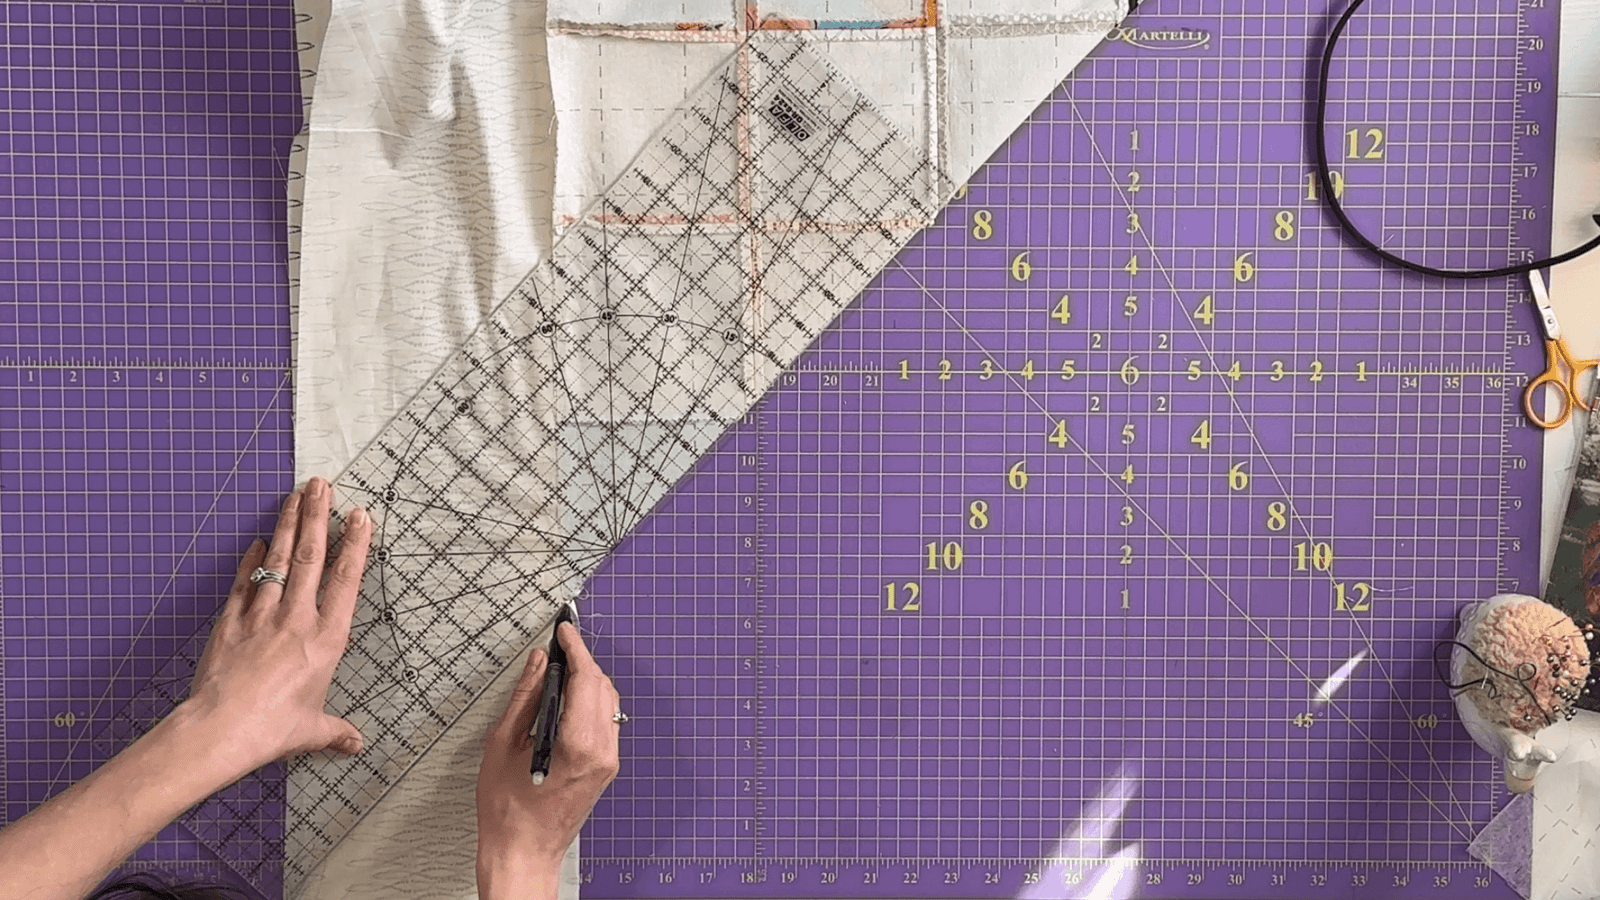
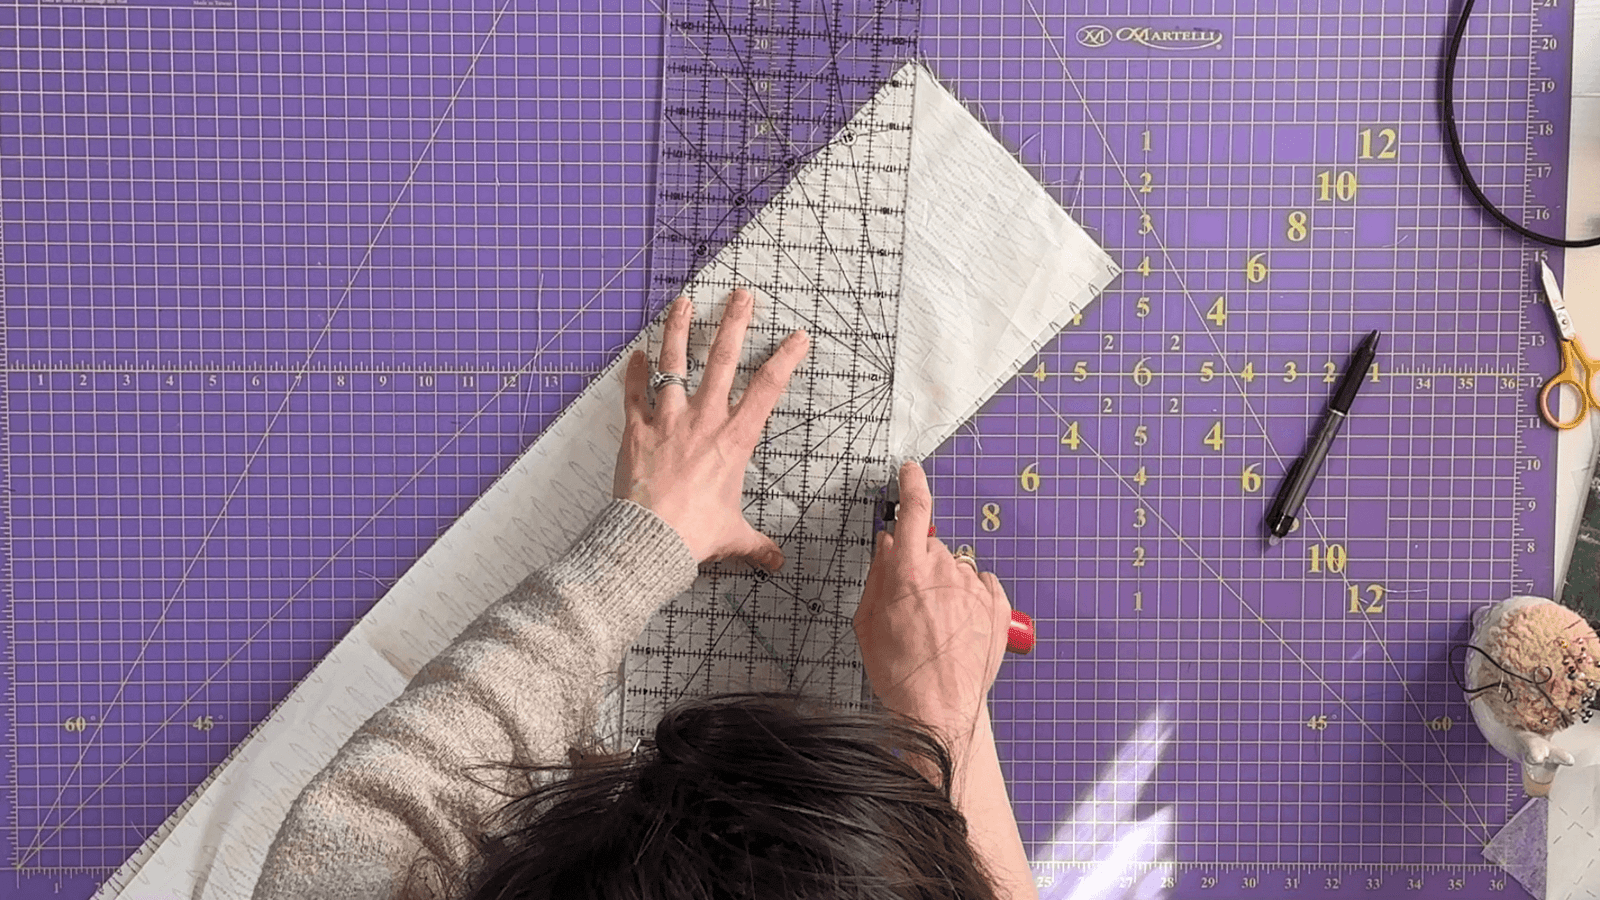
- Check your angle! Use a ruler with a 45° marking to ensure you’re truly at a 45° angle. Line up the 45° mark with a seam line on your quilt, while keeping the straight edge of your ruler aligned with your quilt’s edge.
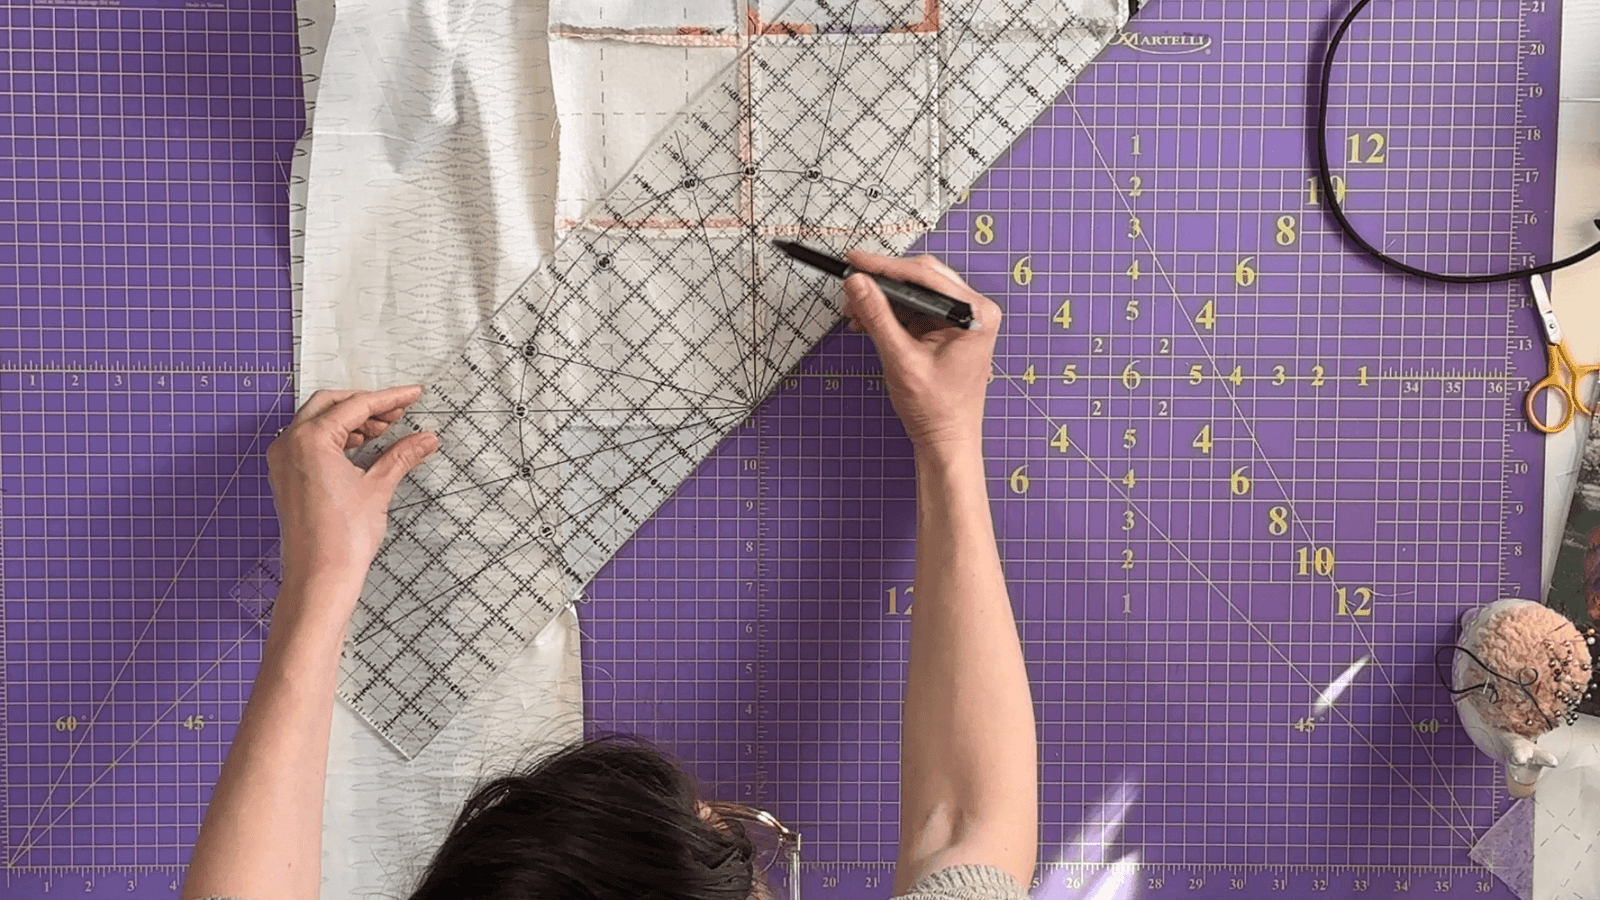
- Once perfectly aligned, use your erasable marker to draw a line from where the quilt center meets the border, extending the fold angle across both border pieces.
- Pin along this line to keep everything in place.
Sewing the Miter
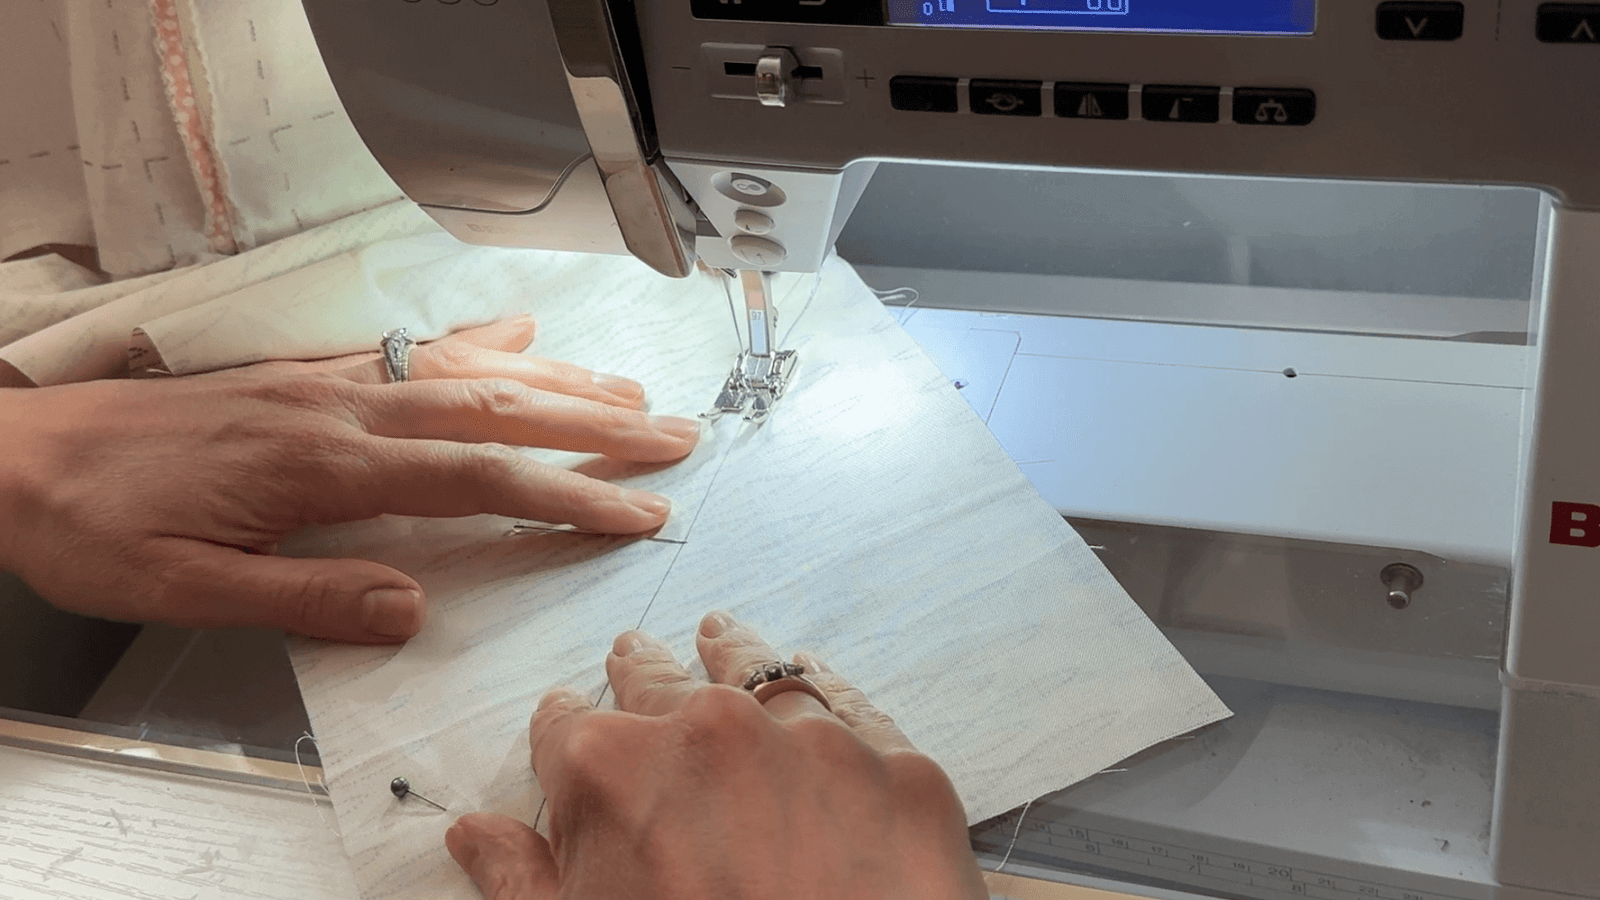
- Take your pinned quilt to the machine, keeping the quilt center folded out of the way.
- Start right at the point where all seams meet (where your border joins the quilt center).
- Sew carefully along your drawn line, backstitching at beginning and end.
Trimming and Pressing
- With your quilt center safely folded out of the way, trim the excess border fabric, leaving a 1/4″ seam allowance.
- Press the border seams toward the border.
- Press the miter seam open to reduce bulk at the corner.
Check Your Work!
Take a moment to admire your corner. It should form a perfect 45° angle with the pattern flowing seamlessly around the corner. The border should lie flat (right hand image) without any waves or puckers.

If your corner looks pointy or your border is wavy (left hand image), don’t despair! You don’t need to remove the entire border – just undo the mitered corner stitching and try again with a more precise 45° angle.
WHY is my border wavy!?
This is a super common problem because you really have to get your angles perfect for everything to work out. Luckily, a wavy border = too much fabric, so while it’s annoying to rip & stitch again, you don’t need to start over completely. Here are some reasons that wavy borders appear:
- Your ruler slipped: This happened to me while filming this video! I re-watched after discovering my own wavy border and saw the instant replay of where things went wrong. The reason this makes such a big difference is that when you’re working with angles and the ruler slips, the result is exponential. A 1/8″ slip at the inside of the border can result in as much as an inch on the outside as your pen travels.
- You didn’t lay your work flat: Getting your project laid out completely flat makes a HUGE difference when working on mitered corners. The more quilt that is folded on the correct angle, the more precise your angle will be.
Take the time to fix a wavy border because it will always appear in the quilting – you’ll see the bunching and bubbling effect and wish you had taken the time to address it when you caught it in the first place.
Practice Makes Perfect
This technique gets easier with practice! I recommend working on one corner at a time until you’re comfortable with the process.
The Final Touch
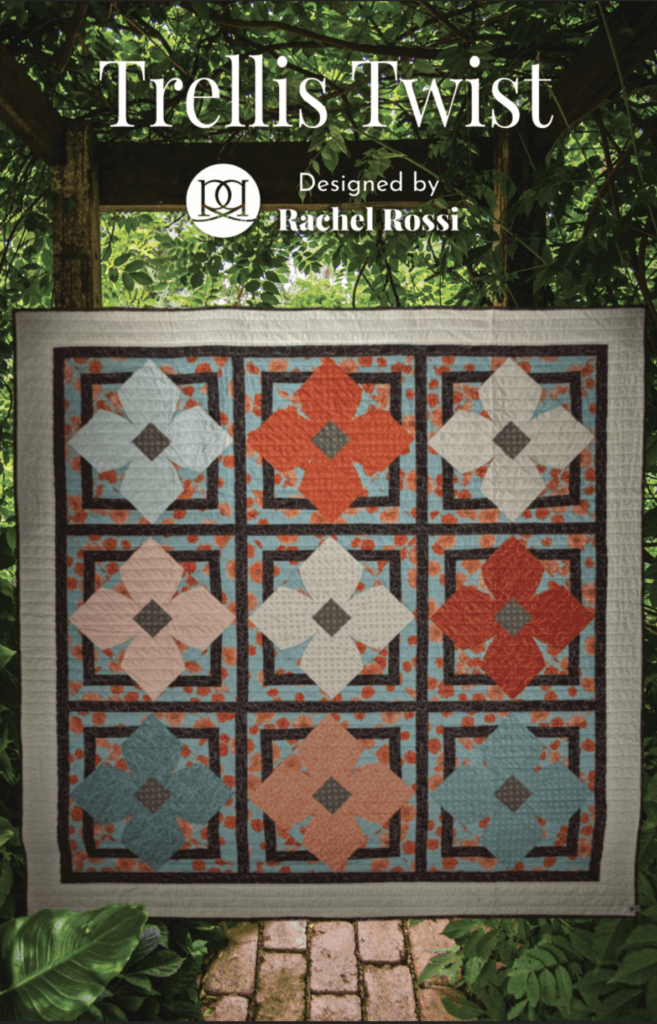
Mitered borders add that extra touch of professionalism to your quilts. They’re particularly stunning on my Trellis Twist pattern (shown in this tutorial) where the borders really enhance the design.
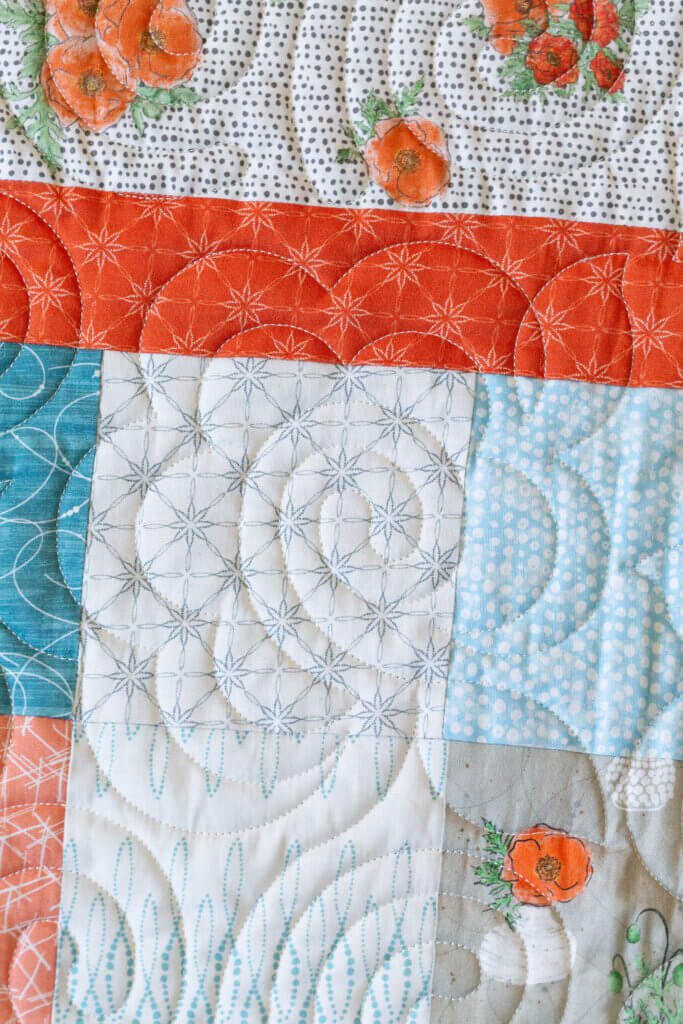
If you love the fabrics in this tutorial, they’re from my new “Modern Vintage: Treasured” collection for Benartex Fabrics! This beautiful line is printed on 100% unbleached cotton and is OEKO-TEX Standard 100 certified, creating an exceptionally soft quilting cotton.
A Little About My New Fabric Line
If you’re loving the fabrics I used in this tutorial, they’re from my new fabric line for Benartex called “Modern Vintage: Treasured” This beautiful line is printed on 100% unbleached cotton and is OEKO-TEX Standard 100 certified, creating an exceptionally soft quilting cotton. You can learn more about the line here!

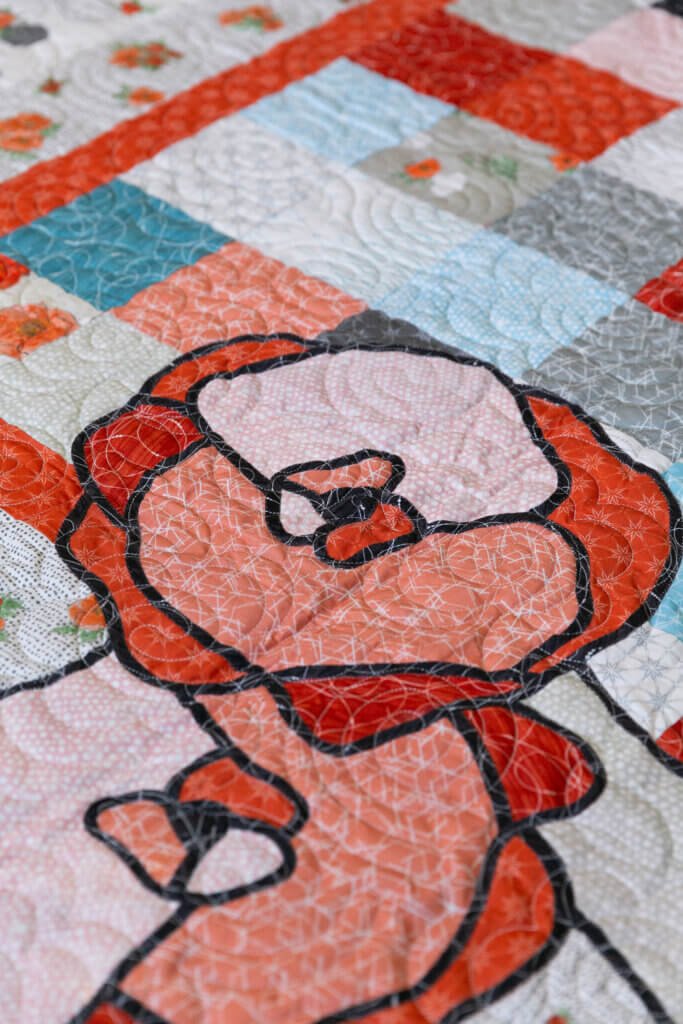
With colors like dusty blue, off-white, and terracotta, this collection brings warmth and vintage charm to any project. The fabrics you see in this tutorial are featured in my Poppy Patch quilt pattern, which combines this mitered corner method with bias tape appliqué for an unforgettable design.


Ready to Try It?
This mitered corner method is perfect for the wide borders of the Poppy Patch quilt or Trellis Twist. Have you tried the mitered corner method before? I’d love to see your creations if you give it a go!