
Nine weeks away from meeting our little one, and things are finally starting to take shape in the nursery! I’ve been paining over how to decorate over our babe’s crib for weeks now & finally got it (halfway) figured out! While I’m still debating what to do with the slender shelf that runs along the wall, I’ve got the perfect solution for what is below that shelf! Today I’m going to show you how I made my own fabulous DIY Map Wall Art & how you can too!
Note: Some of the links below may be affiliate links. This means that if you choose to click through and purchase via one of these links, I will receive a small commission. That’s how I’m able to provide you with great tutorials twice a week, free of charge! Thank you for your support.
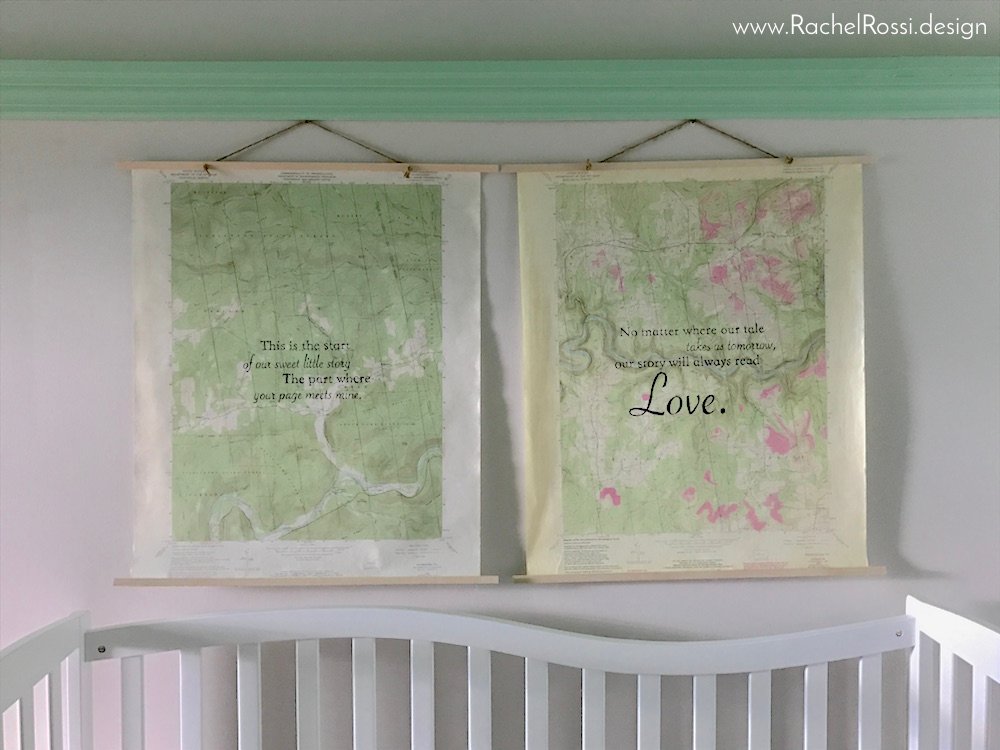
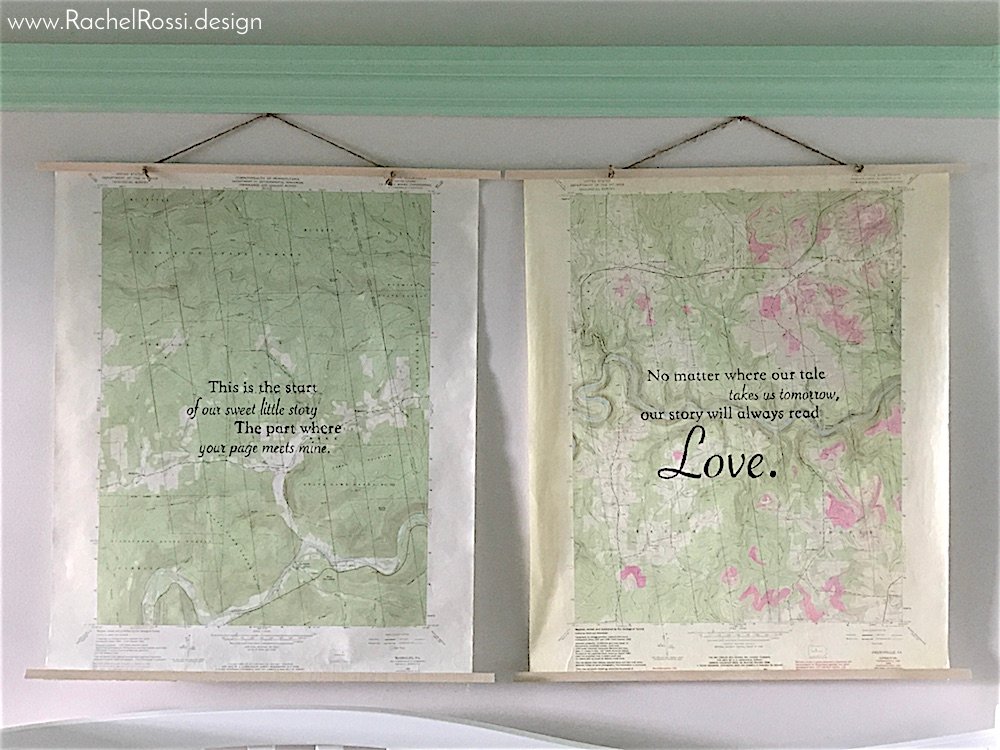
I picked up these sweet topographical maps early on in my pregnancy—they were my inspiration pieces for the nursery color scheme: mint, baby blue, and just a little bit of coral. They’ve been sitting in an empty crib for 7 months now, just waiting for inspiration! I initially wanted to chop them up and put them on canvas, but I was worried that if they were placed over the crib and fell, we’d have a problem. I decided to just add some simple dowels to both ends to keep the maps flat and hang them that way. They might need to be moved once baby starts reaching and grabbing, but for now, they are the perfect thing!
How I Made My DIY Wall Maps
Supply List:
- Printed quote (download my templates here)
- 2 Maps
- Light Box
- Fine Point Sharpie
- Pencil
- (4) 20″ Dowel rectangles (The length of these will vary depending on your map size)
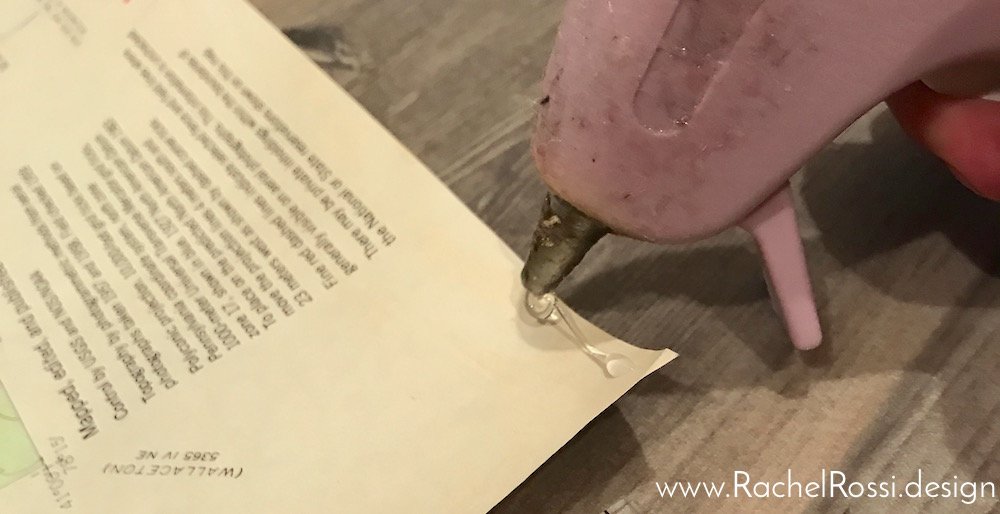
- Hot glue gun/ glue sticks
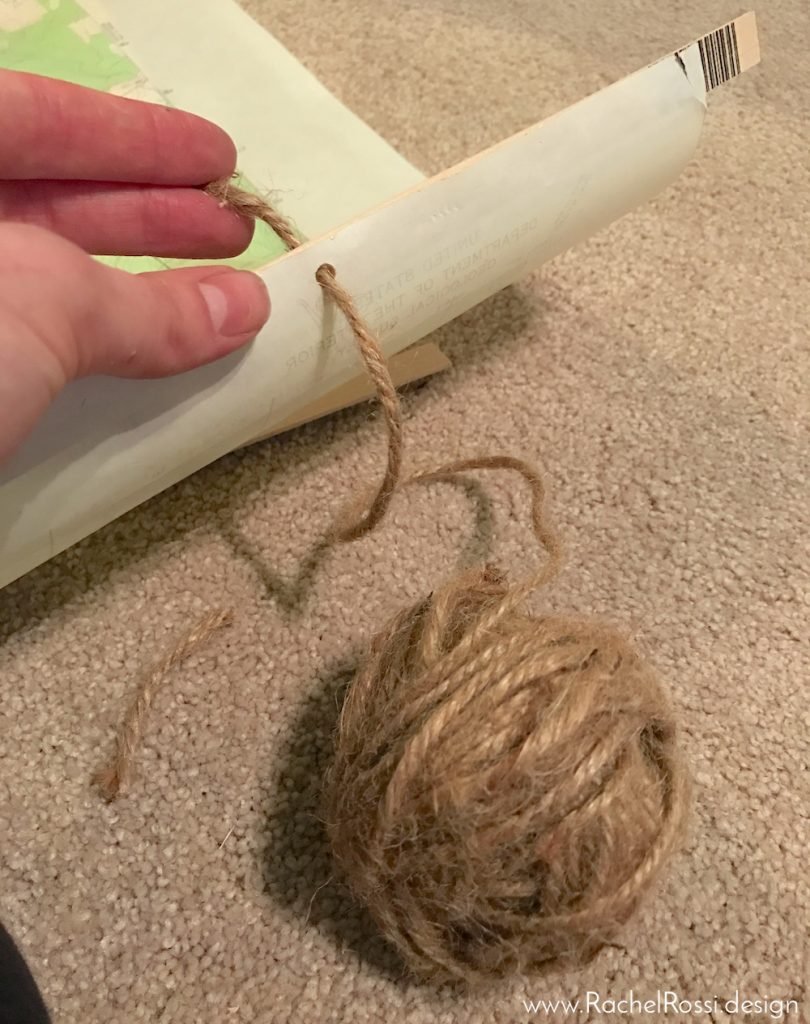
- Twine
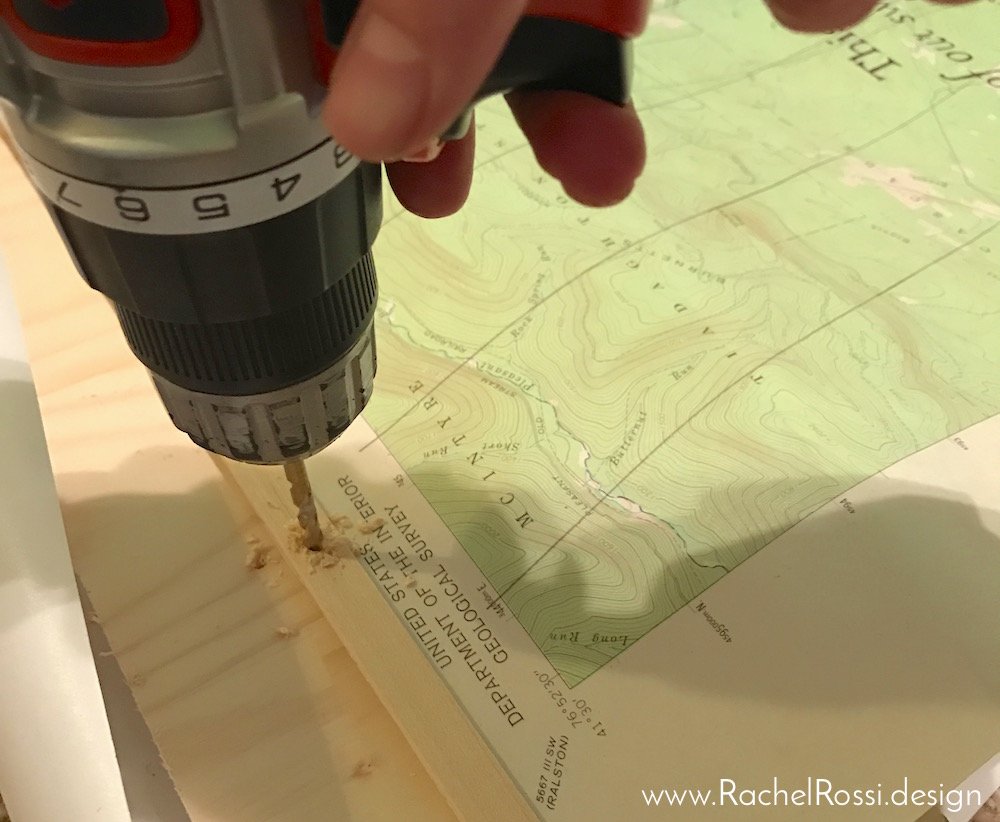
- Drill
Choosing a Quote
This part took me FOREVER! Then, in one of my pregnancy-hormone-induced-all-nighters, I ran across this gem: “This is the start of our sweet little story. The part where your page meets mine. No matter where our tale takes us tomorrow, our story will always read Love.” Perfect! I especially love this quote, because you can separate the maps and it still makes sense! I went to work, getting the fonts and layout how I liked them.


Then I printed the templates out. You can download and print the same ones here!
Then I placed the papers on top of the maps in all sorts of configurations, but decided that I liked them centered best.

Transferring the Quote
The next part of the project seemed to take a while, but it was all worth it!
First, I had to find the center of my quote template and maps, I marked them both in pencil so that I knew things would line up precisely. This is really important when using maps, because the latitude and longitude lines make it really hard to tell what is straight and what is not. Make sure to go back and erase your pencil marks when you’re all done.


Then, I flipped on my light box, and lined everything up. I made sure one last time that the center of the map and the center of the template were lined up perfectly.
Here comes the nail biter! I started outlining all of my letters, using the fine tipped sharpie. This can be a bit nerve wracking, so make sure to take breaks often! I didn’t color everything in until I had all the outlines completed. Don’t worry about things looking pretty at this step.

Filling in the Words
After switching off the light box and letting my eyes adjust (I have a REALLY bright light box), I went about coloring in my letters. I also took this chance to smooth out any lines that were a little wiggly or off.
Note: To avoid smudging the ink with your hand, make sure to put a clean piece of paper over anything that you’ve used sharpie on!

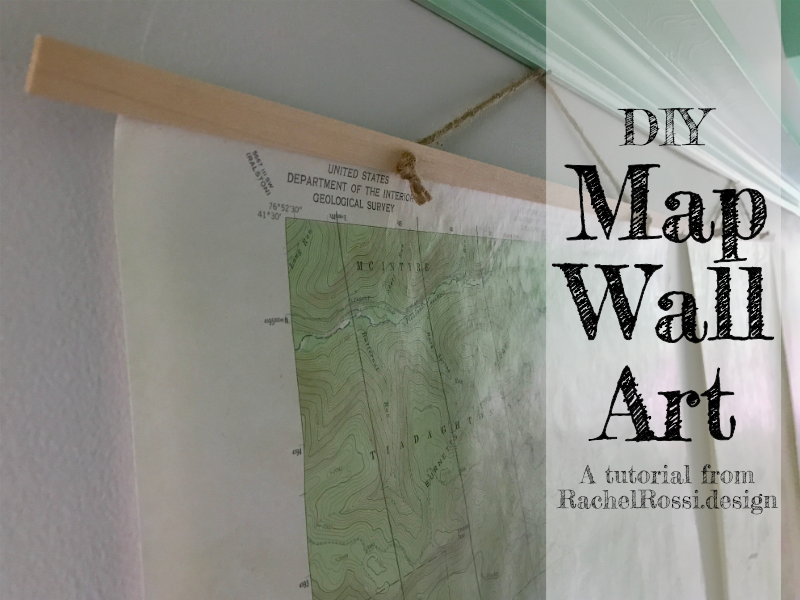
How to Hang Maps without a Frame
Once everything was colored in, it was time to attach the hanging hardware!
I got my dowels ready while I waited for the hot glue to heat up. My maps were exactly 2″ shorter than the dowels, so I left them at the length I bought them. Feel free to trim yours if you like! To attach the dowels, I simply ran a small bead of hot glue along the bottom of my map…
Then I quickly placed the dowel straight across, making sure to leave a 1″ overhang on both sides.

I repeated this step on the top.

Next, it was time to get out the power tools! I drilled two holes in the top dowel about 5″ in from either side. Make sure to do this very carefully and hold onto either side of the dowel, the drill is a little too powerful for this delicate wood and paper, so be careful not to crack the wood or rip the paper!
Next, I threaded my twine through the back and knotted a single knot on front. Repeat on the other side, making sure that you leave enough twine for hanging at your desired length.
That’s all there is to it! Hang it up and love it! I’m pretty tickled with the final result and can’t wait to finish this wall up! I’d love to see your take on this project in the comments below or on Facebook!
Enjoy reading this post? To make sure you don’t miss a thing, follow me on Pinterest, Facebook, and Instagram and sign up for an email subscription to my blog.
Until next time, happy creating!