Ooh La La!

Today I’ve got a short tutorial for you on French Seams. I’ve decided to post this because I recently created a new sample for my Squared pattern and there miiiiggggghhhhhtttt be something rather exciting coming your way next month (shhhhh! don’t tell, but IT’S A RE-RELEASE! New style options and sizes for minis and mommies alike!)
Yes, it’s true! Squared is on it’s way out and Squared² is going to be taking it’s place! It’ll have the original simple shawl or cape design along with:
- Expanded Sizes: Adult, Junior, Big Kid, Child, and even Toddler
- Style options and instructions: Fashion Button Closure, Sleeves, Trim, Belts, and more!
- It’s still the great old simple pattern, but with new options for more creative results!
But more on that in October! Today is a day for learning how to do a French Seam for a really finished piece.
French Seam Tutorial
In this tutorial, we’ll be creating a French Seam along the neckline of the fashion wrap. You will see this sort of a seam called for when you don’t want to see a fraying seam, typically on nice pieces of clothing.
If you’re adding a French Seam to a pattern that doesn’t call for it, I’d suggest adding 1/2″ of fabric to the seam allowance when cutting. It takes a bit more fabric than a standard seam.
First, Stitch a Regular Seam…Backwards
You read that right! The first step is to sew the seam as you normally would, only WRONG sides together! It feels so wrong, but I promise — it’s right.

I used a scant 1/4″ seam here. Typically, you’ll use 1/4″ seam and then trim down to 1/8″ seam. Why trim and not just sew it the right way the first time? Because most machines can’t accurately stitch 1/8″ seam!
Press
Now, press your seams open and make sure it’s nice and flat.

Once that’s pressed nice and flat, you’re going to trim your seams down to 1/8″ and fold your fabric over so that you’ve sandwiched the raw edge of the seam inside.
NOTE: I chose to keep my 1/4″ seam and use 1/2″ seam in the next step because I was worried about those hand stitches unraveling. Choose whatever you feel most comfortable with!
Fold & Stitch

Make sure that the seam where the two fabrics meet is nice and flat here. Once you’re sure it’s laying nicely, stitch down the seam 1/4″ away from the folded edge (again, I used 1/2″ for my project, but 1/4″ is standard).

Make sure as you’re sewing that all the raw edges are getting trapped between your stitches and the folded edge. If not, either trim your seams a bit more or adjust your seam allowance.
Press Again
Now your seam is officially hidden! At this point you can press it in either direction (this might vary based on your project

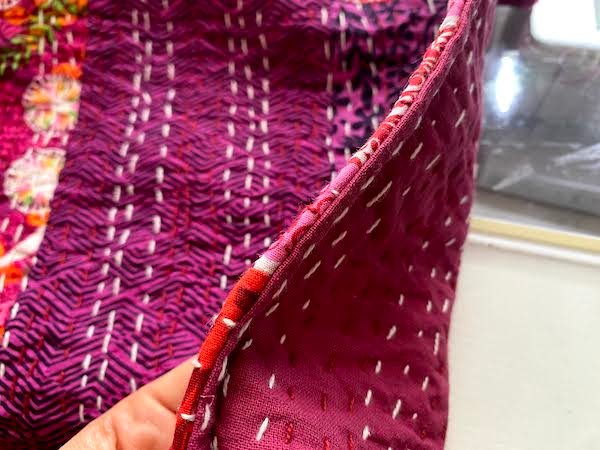
French vs Flat Felled Seam
After pressing, I realized that I liked how I couldn’t see any stitching on the exterior of my project, so I chose not to stitch down the seam a second time like I had originally intended. If I had done the second set of stitches, this would have created a Flat Felled Seam. To show you the difference, I’ve got both images below:


Done!
Now, if you’re not already, make sure that you subscribe for updates from me (don’t worry, I don’t have time to Spam you every day!) BECAUSE you’re going to want to get your hands on the new Squared pattern and I know you’re wondering where I got this fabulous fabric from!
Stay tuned!