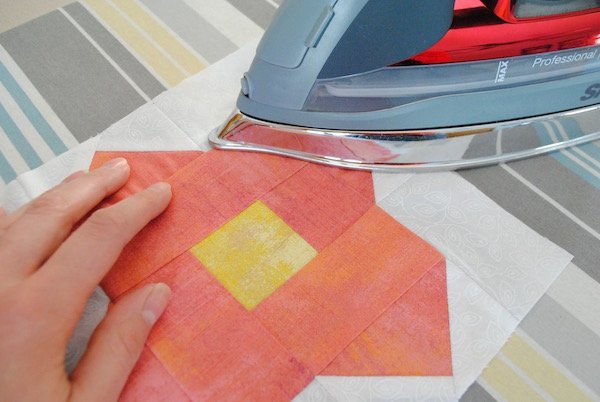
Pressing is just a pretty word for ironing. I’m sure they had to make a up a name other than ironing so that quilting didn’t sound like just one more household chore: I hate ironing, but I love pressing! There’s no sleeves, no annoying pleats, just a small, square piece of fabric with a seam—I can handle that.
It’s always the little things, isn’t it? The details always add up and make the whole. It’s no different with quilting! Today I want to share, what I think, is one of the easiest ways to make your quilts better, yet most people don’t think about: pressing. It’s a part of every quilt project, but I often will see a quilt that could look 75% better if the quilter had just taken an extra second to really press her (or his) seams better. Read on to see my 5 steps to getting a beautiful pressed seam, and in turn, a more beautiful quilt!
Follow the Instructions
Your pattern designer has pained (for hours) over which direction to press the seams, I promise! So, first, follow the pattern instructions. You’ll run across two different ways to press your seams:
Press Seams Towards or Away From…
The first, and most common way to press seams is to press both seams in a certain direction. This is very simple, just push both over in the direction that you are told. This seems simple, but keep reading for the best practice when doing this!

Press Seams Out (Or Open Seams)
Pressing the seams out is not something that I do a lot in my own patterns, unless I have a lot of points where the seams become too bulky. All you need to do it separate the seam and press them in opposite directions.

Start on the Back
No matter what direction you’re pressing your seams, press the back first. This first step will change everything about your quilt! I like to do this rather lightly. It just gives the fabric a little memory or which way to go. My grandmother takes this gentle touch a step further with what she calls finger pressing; she simply presses the seams out with her fingers (this works especially well on a warm ironing board). The same is true for opening seams: just lightly press them apart from the back side of your block.

Flip It
Now you may flip the block over and press the front. I like to get really close to the iron (it’s going to end badly one of these days) and press the seam out with my fingers before the iron goes over it. A safer way to do this might be to gently tug on the seam to make sure that it’s all the way apart.

Press as You Go

Press every seam right after you stitch on a new piece. I repeat: Press every seam right after you stitch on a new piece! You won’t regret it.
Starch It
Once I have a block finished, I like to iron the back lightly one last time, flip it over, and starch the living daylights out of it. I think that the crispness of the starch gives each block a nice firmness and makes piecing go smooth like butter. I swear by Best Press, they have all sorts of delicious scents, my favorite is Mint Splash!

And there you have it: a few easy steps that will improve your quilting skills and give you a more beautiful finished quilt. You’ll be so proud of your work and people will notice! There’s nothing better than a clean, crisp quilt. The comments below are wide open for you to tell me about your pressing tips and tricks, so please leave a comment and fill me in!
Enjoy reading this post? To make sure you don’t miss a thing, follow me on Pinterest, Facebook, and Instagram and sign up for an email subscription to my blog.

Enjoyed the tutorial. One question – do you check the measurement of the “individual” stages of each block as you press. I have found that helps, even although it takes a few seconds extra, it has saved me countless “reverse sewing” hours!
Yes! I don’t do it as much as I should, but when I do, I’m always glad!
Pressing is absolutely vital. It will very quickly let you know if you have gone wonky at an early stage where you can more easily fix it up. It lets you see clearly how you are progressing in matching design features. And it provides the final finishing touch that shows your work at its best.. Thank you for your clear pix to help us learn how to get the most from it.
Thank you! Also enjoyed your tips on squaring up blocks!
I tried the starch on the finished blocks and I am hooked. Another thing I found was laying my plastic ruler on the seam immediately after pressing…for about 20 seconds helped them to lay nice and flat. Do you use steam? I find many say no, yet others say a Little is good? Thoughts?
That’s a great trick! I like to use steam as long as I’m using a high-quality quilting cotton. I’ve found that some fabrics will stretch with steam, but when I can use it, I crank it up!