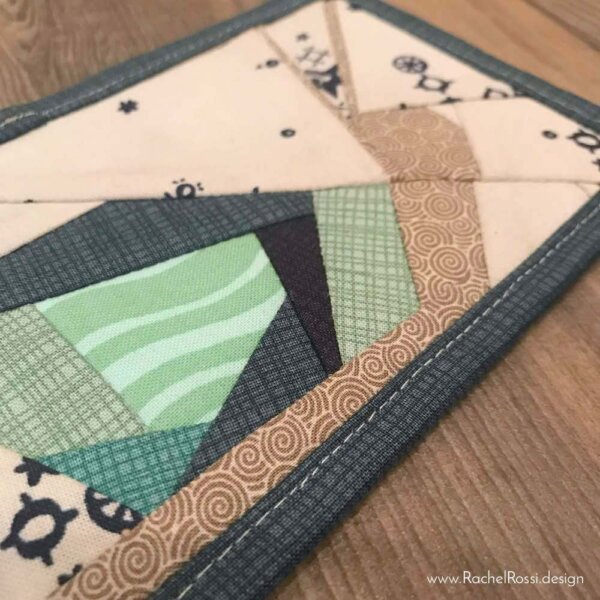
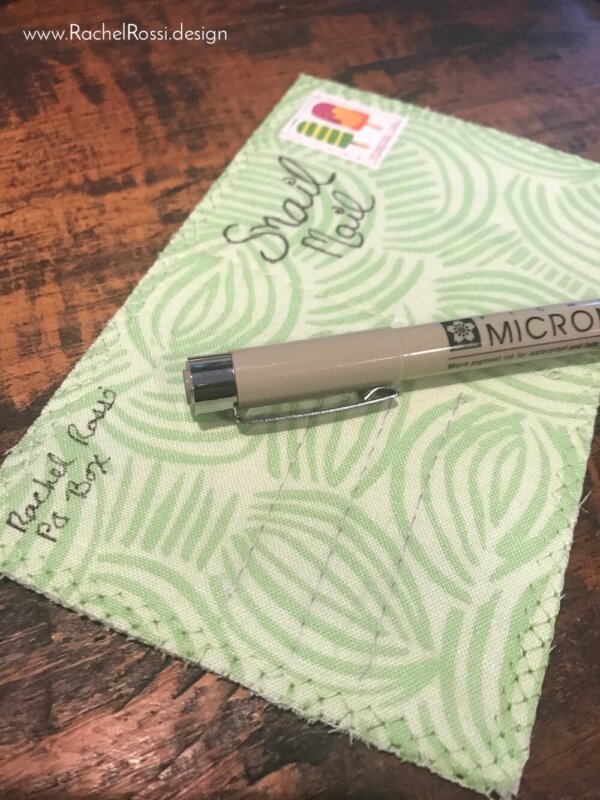
Today I want to share a very fun pattern that I’ve created. If snails aren’t your thing, then you’ll still want to read on and see how you can create a quilted post card…it’s pretty cool!

This page contains affiliate links. As an Amazon Associate, I earn a small commission from qualifying purchases. This helps support the free content I provide, at no additional cost to you. Thank you!
Before we get started, I have to admit—I’ve been holding out on you. I’ve been sitting on this post for a while, but I just knew that I couldn’t post about this post card until I sent one to my sister. When I made my first prototype, I just knew she would melt at the sight of it and the post card had to land in her mailbox before the tutorial landed in her inbox. My sister and I have a special relationship, and part of it is our shared admiration for anything mildly adorable. Snails included.

I initially made this post card as part of my quilt guild’s challenge for the month of June. All we had to do was drop our names (and addresses) in a basket and choose someone else’s slip. Then we each made post cards and sent them before the next guild meeting. It was such a pleasure to make these teeny tiny masterpieces and even more fun to receive them. I’d definitely suggest a quilted postcard if you’re looking to brighten someone’s day or need a fun activity for your sewing group. The options are completely limitless and you will be the talk of the post office with your single-stamp quilted post card. Let me show you how I made mine!

How to Make a Quilted Post Card
I’ll give you the full tutorial in a second, but here’s the ground rules:
- Keep it skinny: the total postcard cannot be thicker than 1/4″ – I learned this the hard way (well, the my fellow guild member did…I went crazy and put binding on mine and she had to pay the additional postage fee upon receipt…it was $0.71, but I still feel a little guilty about that!
- Make sure you use the right stamps: Yes, you’re technically shipping a postcard, but a postcard stamp won’t cover you. You’ll need to use one letter stamp, assuming that you’re under the 1/4″ thickness.
- I haven’t had any issues with the machines eating my postcards, but if you’re worried about it, use a clear envelope so that you can show off your hard work and protect it.
What You’ll Need
- 4×6 piece of Fusible Web (not required, but very helpful) or an Elmer’s Glue Stick
- Fabric/scraps for the front
- 4×6 piece of Pellon interfacing (Ultra Firm)
- 4×6 piece of fabric for the back (white or off white is usually best)
- Embellishments galore! Buttons, ribbons, trim—whatever tickles your fancy.
- 1 letter stamp
- Fine point Sharpie Marker or Micron Pen
How to Create a Fabric Post Card
Now that we’ve gotten all the details out of the way, let’s make this thing! First, decide what you’d like the front to look like. You can download my Snail Mail pattern, use my Polaroid Post quilted postcard pattern, or go with your own pattern. I’ve found Foundation Paper Piecing goes really quickly and looks really sharp on these post cards, but you can do any technique you like, even embroidery!

The only rules with the design are to make it finish at 4″ x 6.” If you’re planning on embellishing, only make the piecing for now, we’ll add the bling later.
Once you’ve gotten your post card front made, use Elmer’s Glue (or basting spray) to hold it to your piece of Pellon. Quilt or embellish as desired. A few simple stitches hold things together nicely, no need to go crazy (unless you want to, of course!)

And yes, you may now add all manner of bling: buttons, confetti, trim…the world is your oyster.
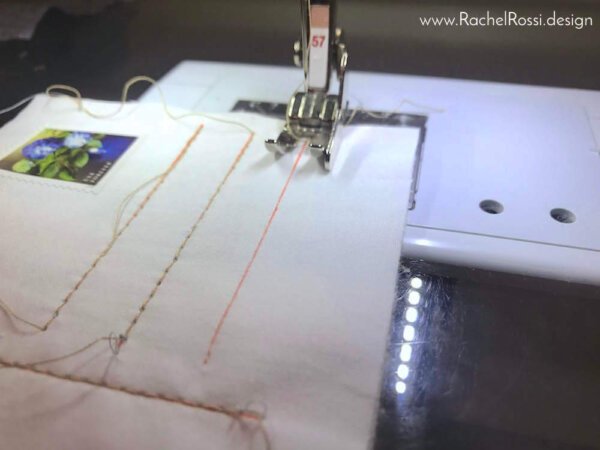
Let’s set that aside for now and get to work on the back. I like to find the center and stitch a line down, rather than drawing it…it just feels right for a quilted post card. To do this, simply layer a piece of interfacing on the wrong side of your postcard back. Use a erasable fabric marker to draw a line down the center and stitch along there. I also stitched a sweet little stamp on, just to make sure it arrived safely (although, I think I’m the only one who does this, stamps seem to stick well without stitching!).

Now that both sides of your postcard are ready, it’s time to finish off the edges! As I mentioned earlier, I lost my mind and actually bound the edges…that just cost me more time and my recipient more money. If you go this route, just be sure to have the postmaster weigh it and charge you accordingly before you send.
The simplest way to finish your fabric post card edges is to fuse or glue the front and back together, and simply zig zag the edges. Serging the edges is also gives a really nice look. Alternatively, you could play with many of the decorative stitches available on your machine.

Now all that’s left is for you to write in a witty little saying or encouragement for your friend! I’m fairly convinced that I’m going to start making these silly postcards more often, it really gets me giddy and is such a thoughtful gesture for special friends and family members. I also love that while cards typically get thrown away, this postcard is something that will be saved, hung on the wall, or tucked away with other precious treasures.

I’d love to see what you come up with! Make sure to post your makes on my Facebook page or tag me on Instagram and use #snailmailpostcard
And don’t forget to download your Snail Mail Quilted Postcard Pattern!
Enjoy reading this post? To make sure you don’t miss a thing, follow me on Pinterest, Facebook, and Instagram and sign up for an email subscription to my blog.

What a cute little post card. I mail mine in clear envelopes, and yes, it does cost me $.71 to mail them, but the recipients love them!! Thanks for sharing your cute pattern!
What a super cute idea for a postcard; it’s perfection. Thank you so much for linking up with the Tips and Tutorials Festival!
Thanks so much- how can you resist?!
i love this little snail postcard and the tutorial as well.
I love this! I’d like to make up some valentines postcards using this tutorial. Does anyone have a photo or a link to the clear envelopes that could be used? I’m mailing across the country, and am wondering if I need that extra layer of protection. Would I still put the stamp/address on the postcard itself, or on the envelope?
You can definitely find these on Amazon, you could put the address on the postcard, I’d just make sure that it’s visible to the carrier.
Happy sewing!
I would like to teach this at our Guild meeting. Would that be okay?
Pam Smith
Moonstone Quilters
Mckinleyville, CA
Board Member
Hi Pam,
Thanks so much for this question. Anything in the blog post is fine to share with your guild. That said, since this is no longer a free pattern, if you were planning to distribute the pattern, you must pay for the total number of patterns being distributed. For example, if you’ve got 20 members that will be using the pattern and making it, you’ll need to purchase 20 copies or send members to my website to purchase their own.
I really appreciate you reaching out and respecting the copyright on my work! 🙂