After talking to some new quilter friends of mine, I’ve quickly realized that there are so many different ways to do the same thing in quilting and sewing! A lot of people have questions about how to quilt their tops and how to do binding. Last week I went over how to quilt your project (see that post here!), and after quilting comes binding! My favorite way to do this involves a sewing machine and some hand sewing, let me show you how.
Cutting Quilt Binding
To cut your quilt binding, you’ll start by measuring your quilt. We’ll use my Building Blocks Quilt as an example: the length is 52″ and it’s 36″ wide. Add up all sides and divide by the width of your fabric (typically 42″ once you remove selvedge edges). For my quilt I would add all sides ((52 x 2)+(36 x 2)= 176″), and then divide that number by the width of fabric (176″/42= 4.1…) and round up. So, I would need 5 strips. I typically make them 2-1/2″ wide. So for my quilt I would need to cut 5: 2-1/2″ x 42″ strips. If that last paragraph looked like a high school math class, I apologize. Take a look and print out the guide below to help you figure out how much fabric you’ll need!

Piecing Binding
Piecing binding is really simple, and you can just use a straight line, but if you’d like to disguise your seam, it’s just as simple! Take one strip and place it on a flat surface in front of you, right side up. Take a second strip and match the corners to the first piece in the perpendicular direction, right side down. Draw a line diagonally, from corner to corner and pin. Sew along the line that you drew.

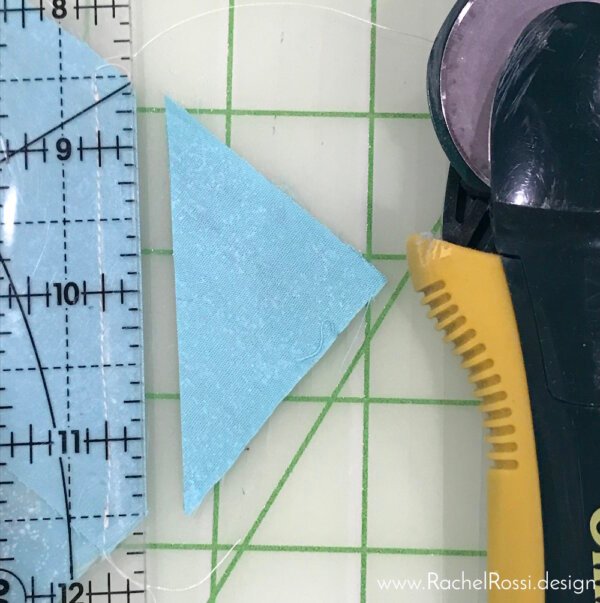
Use a rotary cutter to trim the corner to 1/4″ seam.

Press the seam to one side. If you prefer a diagram view—here’s the last few steps:

Repeat on remaining strips until you have one long strip.
Adding Binding to Your Quilt
After piecing you binding, lay it on your ironing board, wrong side up. Fold in half lengthwise, wrong sides together, and press. Do this until the entire length is complete.
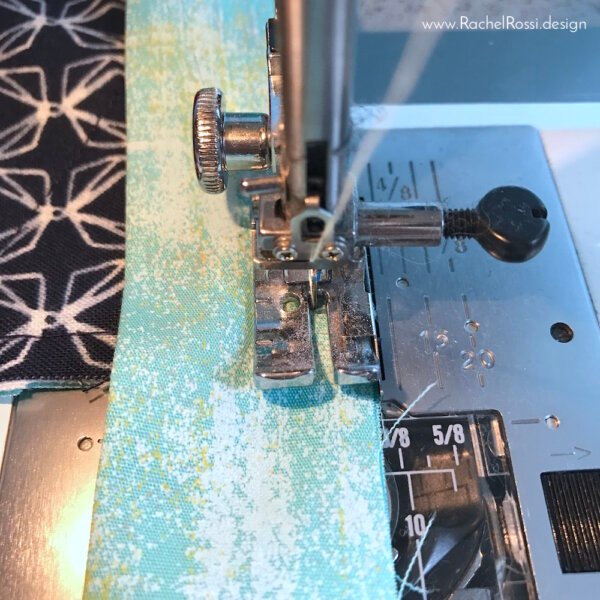
Carefully place your quilt, top up, on your sewing machine. Place your binding strip on top, matching the raw edges to the raw edge of the quilt. Leaving a tail of 9″ at the beginning and end, sew the binding onto the quilt using 1/4″ seam.

When you get to a corner, stop 1/4″ before the edge. Put your needle down into the fabric, raise the presser foot, and turn so that the corner is at a 45 degree angle. Sew straight to the corner. Backstitch. Remove quilt from under presser foot and trim threads. Fold binding up, making a straight line with the quilt edge (first image below). Holding the fold in place, fold the binding back down along the quilt edge (second image below). Start sewing again at the corner and repeat this at each corner. For a full tutorial on this, make sure to see my post about Getting the Perfect Binding Corner!
Finishing Binding
My favorite way to join the binding ends is to use the Fons & Porter Binding Tool—it turns your binding into a continuous loop. There’s no weird fold or anything, just a nice seam that looks like the rest. Make sure to check out my step-by-step tutorial on how to use the Binding Tool!

Hand Sewing Binding
The last step to finishing your quilt is to hand sew the binding. I like to snuggle down with a good movie and hand stitch the binding onto the back side of the quilt:
Start by folding the binding over from the front to the back. This will cover all the raw edges. I like to use binding clips, rather than pins to keep everything in place. I get much better results this way and there’s no poking!

Then, I simply hand stitch the loose binding edge to my quilt back. I try to hide my stitches between the layers of binding and the back of the quilt. The way the stitch looks will vary from person to person; some people will completely hide their stitch while others will show a little bit—it’s totally up to you and your style!

Now that you’re on your way to wrapping up that quilting project, let me know how it goes! Were there any tips or tricks that you’d like to share?
Looking For A New Quilt To Bind?
Check out these fun quilt patterns!
Did you know that in addition to fantastic tutorials, I offer quilt and sewing patterns? Here’s a few of my favorites, but make sure to see them all in my shop:

Timber! is one of my most popular patterns—and who could blame that little bear cub?!
Building Blocks is a favorite for baby boy quilts! Simple piecing and appliqué whip up into a cute little quilt in no time!
All quilt patterns are available in my shop, so order your copy today!
Looking for More Great Tutorials?
I’ve got lots of great tutorials and free patterns for you! Make sure to check them out:

Enjoy reading this post? To make sure you don’t miss a thing, follow me on Pinterest, Facebook, and Instagram and sign up for an email subscription to my blog.


Hi Rachelrossi.design, I just watched your video on binding a quilt , I loved it! I just have one question where is the best place to start the binding on the side or top quilt? Looking forward to seeing more of your work. Joni Smrek
Hi Joni,
Thanks for watching the video- I’m glad you enjoyed it. Where to start your quilt is totally personal preference. Personally, I start on the side, but it really doesn’t matter since you’ll be joining the binding pieces and it should just look like any other seam on the binding. That said, you always want to make sure you start in the middle of whatever side you choose!